Back to RasterLite2 doc index
rl2sniff - an useful sniffer tool supporting RasterLite2
Sometimes handling a relevant number of raster images (may be of different origin and presenting different technical characteristics) isn't an easy task, most notably when your images are dispersed into many different folders.The rl2sniff CLI tool is exactly intended to offer a significant help in organizing and planning any preliminary activity required in order to create and populate your RasterLite2's Coverages.
$ rl2sniff --help

usage: rl2sniff ARGLIST
==============================================================
-h or --help                    print this help message
-src or --src-path    pathname  single Image/Raster path
-dir or --dir-path    pathname  directory path
-ext or --file-ext    extension file extension (e.g. .tif)
-wf or --worldfile              requires a Worldfile
-md5 or --md5-checksum          enabling MD5 checksums
rl2sniff will examine files containing a raster image, and will then create a report showing the more relevant characteristics for each one; the supported arguments are the followings:
- arguments specifying the intended target:
- -src pathname: will examine just a single input raster image.
- -dir pathname: will explore a whole directory aka folder.
- Please note: -src and -dir are mutually exclusive options.
- -ext extension: combined with -dir will restrict the search to a specific raster format.
- if no target is explicitly selected (e.g. when there are no arguments at all) then the current working directory will be intended by default.
- -wf: any georeferencing information will be always retrieved from a companion worldfile.
Please note: in this case any georeferencing found in the worldfile will always override any other information eventually found e.g. within a GeoTIFF image. - -md5: the output report will include an MD5 checksum computed for each raster file.
Please note: computing the MD5 checksums could require a substantial amount of time, most notably when many hundredth huge-sized files are to be scanned.
the output report
the report created by rl2sniff simply corresponds to a TXT/TAB being printed on the stdout file.The report's columns are as follows:
- columns always supported for both georeferenced and non-georeferenced rasters:
- image_format: e.g. GeoTIFF, TIFF+TFW or ASCII Grid.
- MD5_checksum: may be NULL is the corresponding option wasn't activated.
- image_path: the absolute path leading to the raster file.
- width and height: horizontal and vertical dimensions (in pixels).
- sample_type, pixel_type and bands: e.g. UINT8, RGB, 3.
- no_data: value corresponding to NO-DATA pixels (currently supported only for ASCII Grids).
- compression: e.g. DEFLATE or FAX4; NONE if uncompressed.
- columns supported only for raster of the georeferenced type:
- srid: the declared SRID value; -1 if unknown / unspecified.
- x_resolution and y_resolution: horizontal and vertical pixel resolution.
- min_x, min_y, max_x and max_y: extreme points of the raster's bounding box aka BBOX.
a practical how-to guide
I've casually found in my personal archive an old DVD containing about 700 topographic maps stored as GeoTIFF images; so I've duly decided to use this target as my first rl2sniff testbed.
$ rl2sniff -dir E:/CTR_Toscana -md5 >ctrt.txt
     SQLite version: 3.8.5
 SpatiaLite version: 4.2.0
RasterLite2 version: 1.0.0-rc1
$
After executing the above command a full report is now stored into the ctrt.txt file.
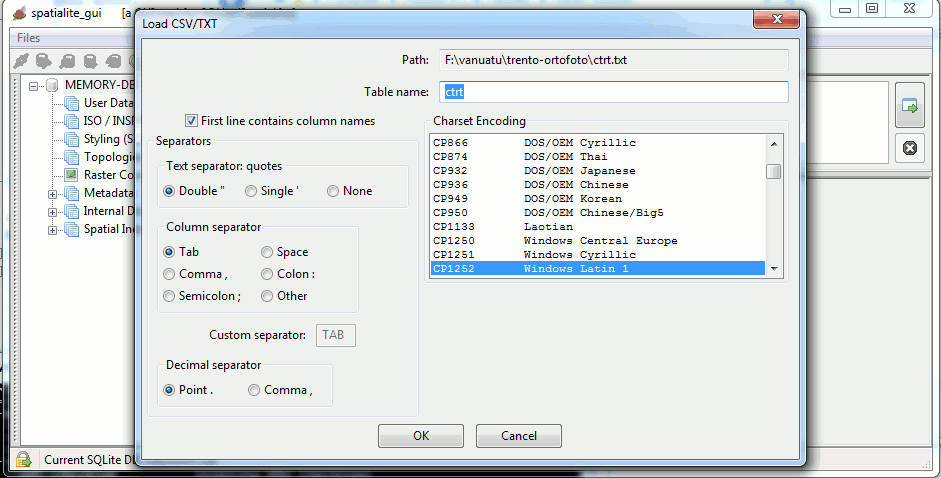
Then I started spatialite_gui and I've imported the report into a DB Table using the Load CSV/TXT widget.
SELECT AddGeometryColumn('ctrt', 'geom', 3003, 'POLYGON', 'XY');
UPDATE ctrt SET geom = BuildMBR(min_x, min_y, max_x, max_y, 3003);
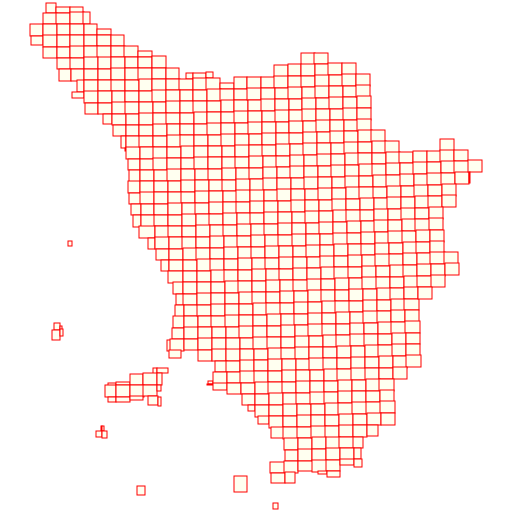
Just a couple of trivial SQL statements, and I had a full Geometry Table exactly corresponding to the input report. Exporting this Table as e.g. a Shapefile wasn't at all difficult.
This figure represents to the overall layout of my 700+ GeoTIFFs.
Taking full profit from Spatial SQL support
SELECT image_path
FROM ctrt
WHERE ST_Intersects(geom, ST_Envelope(ST_Buffer(
  ST_Transform(
    MakePoint(LongitudeFromDMS('43°28′24″N 11°52′12″E'),
      LatitudeFromDMS('43°28′24″N 11°52′12″E'), 4326),
  3003),
5000.0))) = 1;
---------------
E:\CTR_Toscana\288060.TIF
E:\CTR_Toscana\288070.TIF
E:\CTR_Toscana\288080.TIF
E:\CTR_Toscana\288100.TIF
E:\CTR_Toscana\288110.TIF
E:\CTR_Toscana\288120.TIF
E:\CTR_Toscana\288140.TIF
E:\CTR_Toscana\288150.TIF
E:\CTR_Toscana\288160.TIF
Just a quick explanation about the above query:
- 43°28′24″N 11°52′12″E is the DMS notation (latitude and longitude) corresponding to the geographic position of the Town of Arezzo (as reported by Wikipedia).
- MakePoint() will create a POINT geometry in the 4326 SRID
- ST_Transform() will re-project this POINT in the SRID 3003 Monte Mario / Italy zone 1.
- ST_Buffer() will create a circular buffer of radius 5 km (5000.0 m) center on this POINT.
- ST_Envelope() will return the corresponding BBOX.
- and finally ST_Intersects() will identify all GeoTIFFs required in order to cover an area of about 10km x 10km surrounding Arezzo.
$ rl2tool CREATE -db ctrt.sqlite -cov ctrt -smp 1-BIT -pxl MONOCHROME \
  -cpr FAX4 -srid 3003 -res 0.5 -strict

rl2tool: request is CREATE
===========================================================
              DB path: ctrt.sqlite
             Coverage: ctrt
          Sample Type: 1-BIT
           Pixel Type: MONOCHROME
      Number of Bands: 1
          Compression: CCITT FAX4, lossless
   Tile size (pixels): 512 x 512
                 Srid: 3003
Pixel base resolution: X=0.5 Y=0.5
======= Coverage Policies =======
Strict Resolution chek: Enabled
Mixed Resolutions mode: Disabled
 Section's Input Paths: Disabled
Section's MD5 Checksum: Enabled
 Section's XML Summary: Enabled
===========================================================

     SQLite version: 3.8.5
 SpatiaLite version: 4.2.0
RasterLite2 version: 1.0.0-rc1

Raster Coverage "ctrt" successfully created
Operation CREATE successfully completed
$
Then I've created a DB-file containing a Coverage of the appropriate type.
$ rl2tool IMPORT -db ctrt.sqlite -cov ctrt -lst ctrt_list.txt -srid 3003

rl2tool; request is IMPORT
===========================================================
              DB path: ctrt.sqlite
   List of paths from: ctrt_list.txt
             Coverage: ctrt
          Forced SRID: 3003
Ignoring Pyramid Levels for now
===========================================================

     SQLite version: 3.8.5
 SpatiaLite version: 4.2.0
RasterLite2 version: 1.0.0-rc1

------------------
Importing: E:\CTR_Toscana\288060.TIF
    Image Size (pixels): 13835 x 11562
                   SRID: 3003
       LowerLeft Corner: X=1722103.99 Y=4819918.90
      UpperRight Corner: X=1729021.49 Y=4825699.90
       Pixel resolution: X=0.5 Y=0.5
>> Image successfully imported in: 0 mins 40 secs

<------------ snip ---------->

------------------
Importing: E:\CTR_Toscana\288160.TIF
    Image Size (pixels): 13887 x 11584
                   SRID: 3003
       LowerLeft Corner: X=1735956.42 Y=4809273.99
      UpperRight Corner: X=1742899.92 Y=4815065.99
       Pixel resolution: X=0.5 Y=0.5
>> Image successfully imported in: 0 mins 43 secs
>> Total time: 6 mins 25 secs

Operation IMPORT successfully completed
$
And finally I've imported all selected GeoTIFFs into the Coverage by invoking rl2tool and passing the list of files to be imported via the -lst ctrt_list.txt argument.
$ rl2tool PYRAMIDIZE-MONOLITHIC -db ctrt.sqlite -cov ctrt
$
Just a final touch is now required, i.e. building a Monolithic Pyramid.

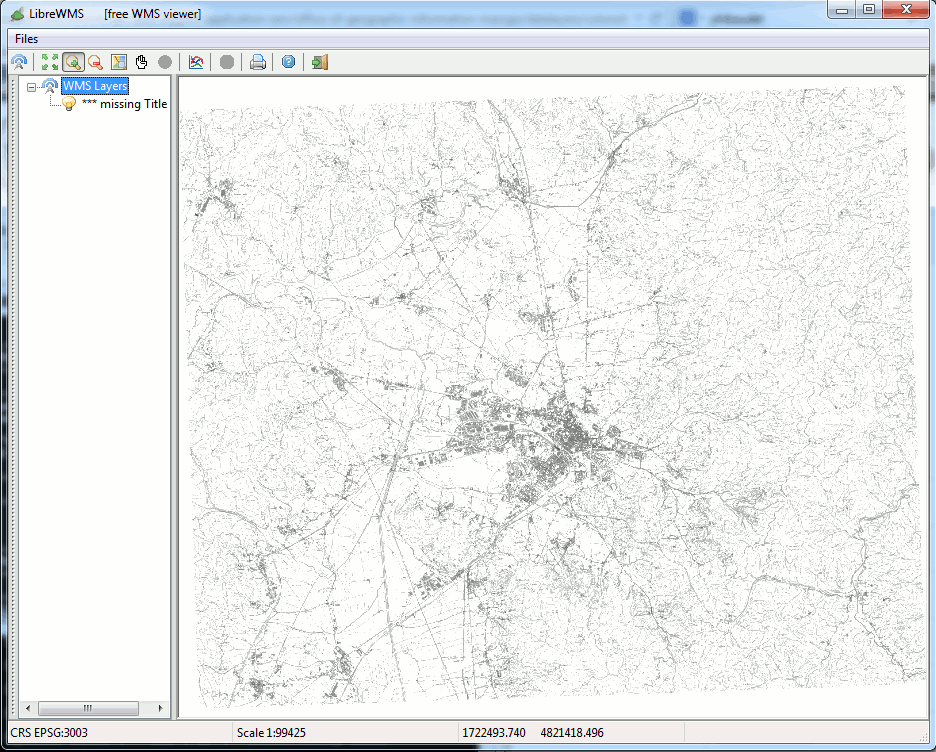
And here is the RasterLite2 Coverage as visualized by wmslite and LibreWMS.
Conclusion: using in a smart way rl2sniff, spatialite_gui and rl2tool made really simple a task that at first glance appeared as an intimidating looking for a needle in a haystack problem.
Back to RasterLite2 doc index