Back to RasterLite2 Tutorials index
Tutorial: adding a 1-bit Monochrome Coverage to the Trento sample
Please reuse yet again the same trento.sqlite DB-file created in the previous Trento tutorial, so to allow an easy and immediate comparison of both datasources.In this tutorial you'll go to add a further Coverage on the same geographic extent, this time using a 1-bit monochrome datasource.
Step 1) dowloading all required CTR files
- open your web browser and go to the Autonomous Province of Trento web portal.
- then using the WebGis interactive service select all CTR TIFF files covering the Municipality of Trento.
- be always sure to select the TIFF format, as shown in this figure:
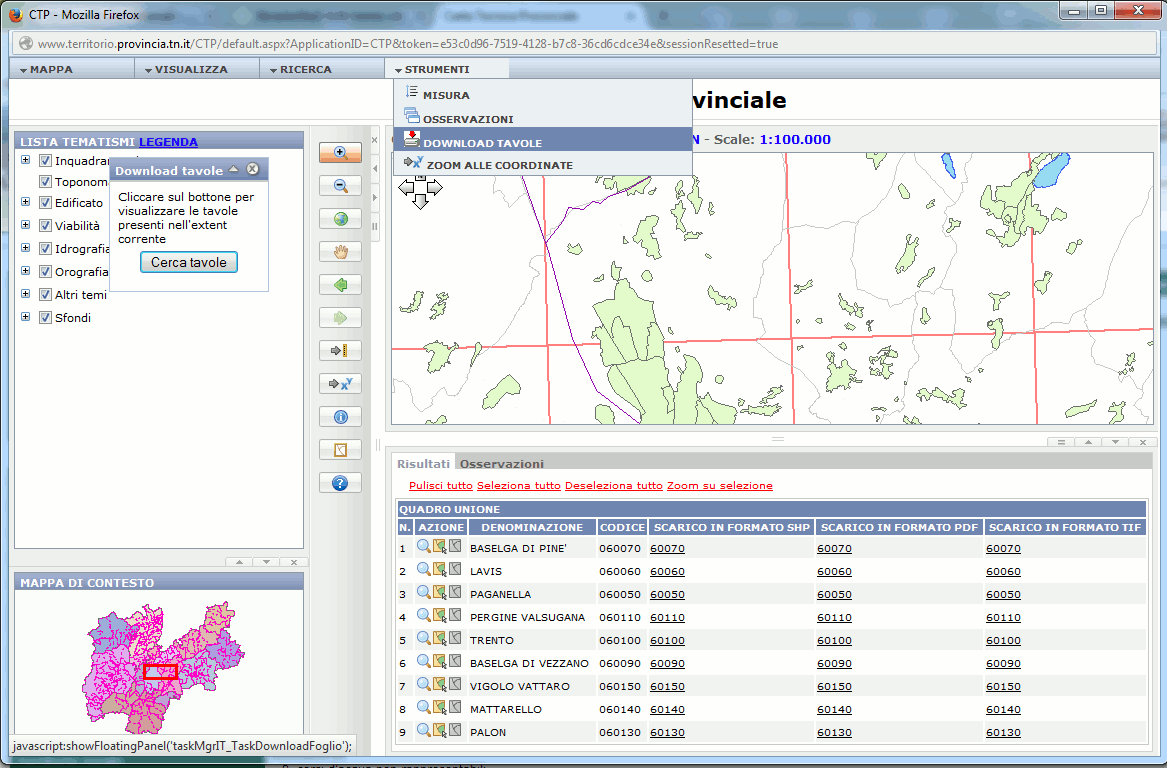
- CTP2013_060020
- CTP2013_060050
- CTP2013_060060
- CTP2013_060090
- CTP2013_060100
- CTP2013_060110
- CTP2013_060130
- CTP2013_060140
- CTP2013_081010
- CTP2013_081020
Step 2) creating the Trento CTR Coverage
$ rl2tool CREATE -db trento.sqlite -cov ctr -smp 1-BIT \
-pxl MONOCHROME -cpr FAX4 -srid 25832 -res 0.6773

rl2_tool: request is CREATE
===========================================================
              DB path: trento.sqlite
             Coverage: ctr
          Sample Type: 1-BIT
           Pixel Type: MONOCHROME
      Number of Bands: 1
          Compression: CCITT FAX4, lossless
   Tile size (pixels): 512 x 512
                 Srid: 25832
Pixel base resolution: X=0.6773 Y=0.6773
===========================================================

     SQLite version: 3.8.5
 SpatiaLite version: 4.2.0-rc1
RasterLite2 version: 0.8

Raster Coverage "ctr" successfully created
$
- More or less exactly the same as you did in the previous tutorial:
- CREATE this main keyword intends that we are trying to create a new, empty Coverage.
- -db trento.sqlite this specifies the target DB-file pathname; this DB-file doesn't yet exist, so it will be implicitly created at once.
- -cov ctr this specifies the individual Coverage's name.
- -smp 1-BIT this specifies the Coverage's Sample Type.
- -pxl MONOCHROME this specifies the Coverage's Pixel Type.
- -cpr FAX4 this specifies that all Tiles in this Coverage must be JPEG compressed.
Please note: 1-bit monochrome isn't compatible with the standard JPEG compression: the CCITT-FAX4 is a specialized compression algorithm exactly intended for such kind of data. - -srid 25832 this specifies the Coverage's SRID.
- -res 0.6773 this specifies the Coverage's base level resolution.
Step 3) populating the Trento CTR Coverage
$ rl2tool IMPORT -db trento.sqlite -cov ctr -srid 25832 \
-wf -dir . -ext .tif

rl2_tool; request is IMPORT
===========================================================
              DB path: trento.sqlite
 Input Directory path: .
       File Extension: .tif
             Coverage: ctr
              Section: from file name
Using the WorldFile
          Forced SRID: 25832
Ignoring Pyramid Levels for now
===========================================================

     SQLite version: 3.8.5
 SpatiaLite version: 4.2.0-rc1
RasterLite2 version: 0.8

Importing: ./CTP2013_060020.tif
------------------
    Image Size (pixels): 9718 x 8458
                   SRID: 25832
       LowerLeft Corner: X=660659.05 Y=5112721.39
      UpperRight Corner: X=667241.08 Y=5118449.97
       Pixel resolution: X=0.6773030012999999 Y=0.6772972164999999
Importing: ./CTP2013_060050.tif
------------------
    Image Size (pixels): 9718 x 8448
                   SRID: 25832
       LowerLeft Corner: X=654370.11 Y=5107000.43
      UpperRight Corner: X=660952.14 Y=5112722.24
       Pixel resolution: X=0.6773030012999999 Y=0.6772972164999999
Importing: ./CTP2013_060060.tif
------------------
    Image Size (pixels): 9726 x 8456
                   SRID: 25832
       LowerLeft Corner: X=660805.29 Y=5107166.67
      UpperRight Corner: X=667392.74 Y=5112893.90
       Pixel resolution: X=0.6773030012999999 Y=0.6772972164999999
Importing: ./CTP2013_060090.tif
------------------
    Image Size (pixels): 9726 x 8450
                   SRID: 25832
       LowerLeft Corner: X=654509.36 Y=5101444.36
      UpperRight Corner: X=661096.81 Y=5107167.52
       Pixel resolution: X=0.6773030012999999 Y=0.6772972164999999
Importing: ./CTP2013_060100.tif
------------------
    Image Size (pixels): 9734 x 8458
                   SRID: 25832
       LowerLeft Corner: X=660951.03 Y=5101610.59
      UpperRight Corner: X=667543.90 Y=5107339.17
       Pixel resolution: X=0.6773030012999999 Y=0.6772972164999999
Importing: ./CTP2013_060110.tif
------------------
    Image Size (pixels): 9742 x 8468
                   SRID: 25832
       LowerLeft Corner: X=667392.21 Y=5101782.65
      UpperRight Corner: X=673990.49 Y=5107518.00
       Pixel resolution: X=0.6773030012999999 Y=0.6772972164999999
Importing: ./CTP2013_060130.tif
------------------
    Image Size (pixels): 9734 x 8448
                   SRID: 25832
       LowerLeft Corner: X=654649.60 Y=5095889.63
      UpperRight Corner: X=661242.47 Y=5101611.44
       Pixel resolution: X=0.6773030012999999 Y=0.6772972164999999
Importing: ./CTP2013_060140.tif
------------------
    Image Size (pixels): 9744 x 8458
                   SRID: 25832
       LowerLeft Corner: X=661096.10 Y=5096054.69
      UpperRight Corner: X=667695.74 Y=5101783.27
       Pixel resolution: X=0.6773030012999999 Y=0.6772972164999999
Importing: ./CTP2013_081010.tif
------------------
    Image Size (pixels): 9742 x 8448
                   SRID: 25832
       LowerLeft Corner: X=654789.34 Y=5090333.73
      UpperRight Corner: X=661387.63 Y=5096055.54
       Pixel resolution: X=0.6773030012999999 Y=0.6772972164999999
Importing: ./CTP2013_081020.tif
------------------
    Image Size (pixels): 9752 x 8458
                   SRID: 25832
       LowerLeft Corner: X=661241.84 Y=5090499.79
      UpperRight Corner: X=667846.90 Y=5096228.37
       Pixel resolution: X=0.6773030012999999 Y=0.6772972164999999

Operation IMPORT successfully completed
$
- now you'll invoke yet another time rl2tool so to import all TIFF images (aka Sections accordingly to RasterLite2 terminology) in a single pass.
- and you'll pass the following arguments (explained one by one):
- IMPORT this main keyword intends that we are trying to populate an already created Coverage by importing from an external datasource.
- -db and -cov: same as above.
- -wf: this directive instructs rl2tool to search and parse an external WorldFile expected to contain georeferencing informations for each image file to be imported.
- -srid 25832: anyway the WordFile format doesn't support an explicit identification of the intended Reference System; so explicitly declaring some SRID value is strictly required.
- -dir . this specifies the input path of the external datasources to be imported; -dir intends that a whole folder (aka directory) will be searched.
Please note: the special name . (dot) simply intents the current working directory). - -ext .tif: then all files from the input folder presenting the .tif file-extension will be automatically imported one after the other.
Step 4) Creating a Monolithic Pyramid
$ rl2tool PYRAMIDIZE-MONOLITHIC -db trento.sqlite -cov ctr -lev 1


rl2_tool; request is PYRAMIDIZE-MONOLITHIC
===========================================================
DB path: trento.sqlite
Coverage: ctr
Pyramid Virtual Levels: 1
===========================================================

     SQLite version: 3.8.5
 SpatiaLite version: 4.2.0-rc1
RasterLite2 version: 0.8

  ----------
    ctr: Monolithic Pyramid Level 1 - Row 1 of 41  successfully built
  ----------
    ctr: Monolithic Pyramid Level 1 - Row 2 of 41  successfully built
  ----------
...................................
  ----------
    ctr: Monolithic Pyramid Level 1 - Row 40 of 41  successfully built
  ----------
    ctr: Monolithic Pyramid Level 1 - Row 41 of 41  successfully built
  ----------
    ctr: Monolithic Pyramid Level 2 - Row 1 of 21  successfully built
  ----------
    ctr: Monolithic Pyramid Level 2 - Row 2 of 21  successfully built
  ----------
...................................
  ----------
    ctr: Monolithic Pyramid Level 2 - Row 20 of 21  successfully built
  ----------
    ctr: Monolithic Pyramid Level 2 - Row 21 of 21  successfully built
  ----------
    ctr: Monolithic Pyramid Level 3 - Row 1 of 11  successfully built
  ----------
    ctr: Monolithic Pyramid Level 3 - Row 2 of 11  successfully built
  ----------
    ctr: Monolithic Pyramid Level 3 - Row 3 of 11  successfully built
  ----------
...................................
  ----------
    ctr: Monolithic Pyramid Level 3 - Row 10 of 11  successfully built
  ----------
    ctr: Monolithic Pyramid Level 3 - Row 11 of 11  successfully built
  ----------
    ctr: Monolithic Pyramid Level 4 - Row 1 of 6  successfully built
  ----------
    ctr: Monolithic Pyramid Level 4 - Row 2 of 6  successfully built
  ----------
    ctr: Monolithic Pyramid Level 4 - Row 3 of 6  successfully built
  ----------
    ctr: Monolithic Pyramid Level 4 - Row 4 of 6  successfully built
  ----------
    ctr: Monolithic Pyramid Level 4 - Row 5 of 6  successfully built
  ----------
    ctr: Monolithic Pyramid Level 4 - Row 6 of 6  successfully built
  ----------
    ctr: Monolithic Pyramid Level 5 - Row 1 of 3  successfully built
  ----------
    ctr: Monolithic Pyramid Level 5 - Row 2 of 3  successfully built
  ----------
    ctr: Monolithic Pyramid Level 5 - Row 3 of 3  successfully built
  ----------
    ctr: Monolithic Pyramid Level 6 - Row 1 of 2  successfully built
  ----------
    ctr: Monolithic Pyramid Level 6 - Row 2 of 2  successfully built
  ----------
    ctr: Monolithic Pyramid Level 7 - Row 1 of 1  successfully built
  ----------
    Monolithic Pyramid levels successfully built for: ctr

Operation PYRAMIDIZE-MONOLITHIC successfully completed
$
- now you'll invoke yet another time rl2tool so to buil a Momolitic Pyramid.
- and you'll pass the following arguments (explained one by one):
- PYRAMIDIZE-MONOLITHIC this main keyword intends that we are trying to build a Monolithic Pyramid supporting an already populated Coverage.
If any previous Pyramid should eventually already exists it will be implicitly destroyed and rebuilt yet again from scratch. - -db and -cov: same as above.
- -lev 1 this optional directive specifies that every Pyramid Level should support just a single resolution: such an option will require more storage space, but in this specific case (1-bit monochrome) will ensure higher quality results.
- PYRAMIDIZE-MONOLITHIC this main keyword intends that we are trying to build a Monolithic Pyramid supporting an already populated Coverage.
SELECT RL2_SetCoverageInfos('ctr', 'Topographical map (monochrome)', '1-bit (monochrome) topographical map')
Please remember: always setting a TITLE and an ABSTRACT for any Coverage being creates always is a strongly recommended good practice.
Step 5) Testing the Trento CTR sample
As you've already done in the previous Planet Earth you can now directly test the Trento Coverage by publishing a standard WMS service.You simply have to start the wmslite light-weight server, then connecting some WMS viewer (e.g. LibreWMS) to the service being published on localhost aka IP address 127.0.0.1, port 8080.
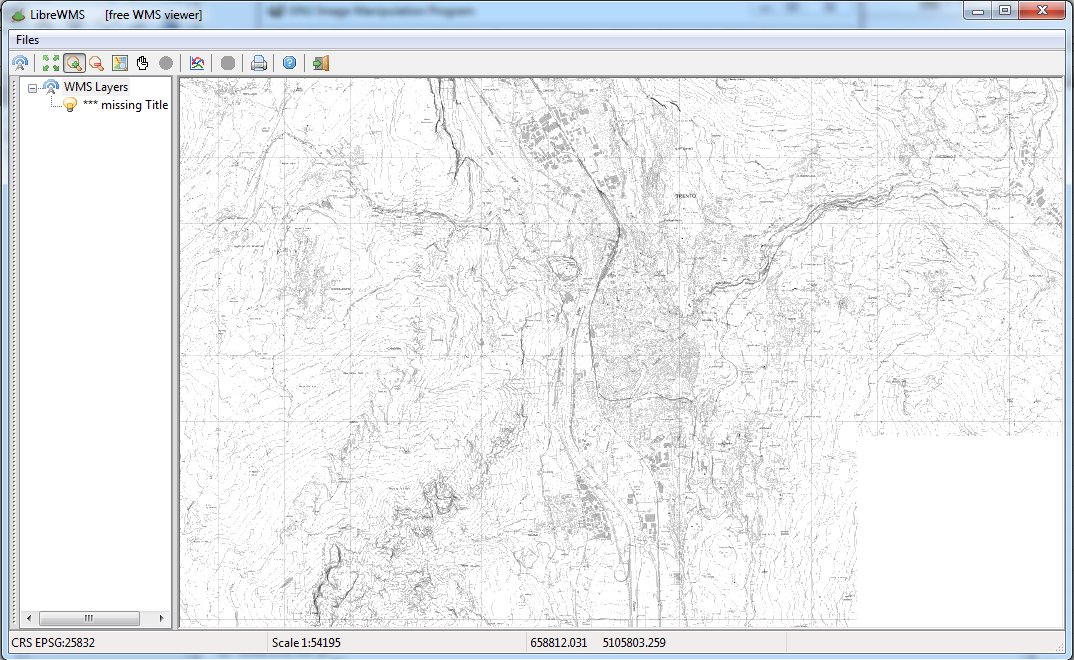
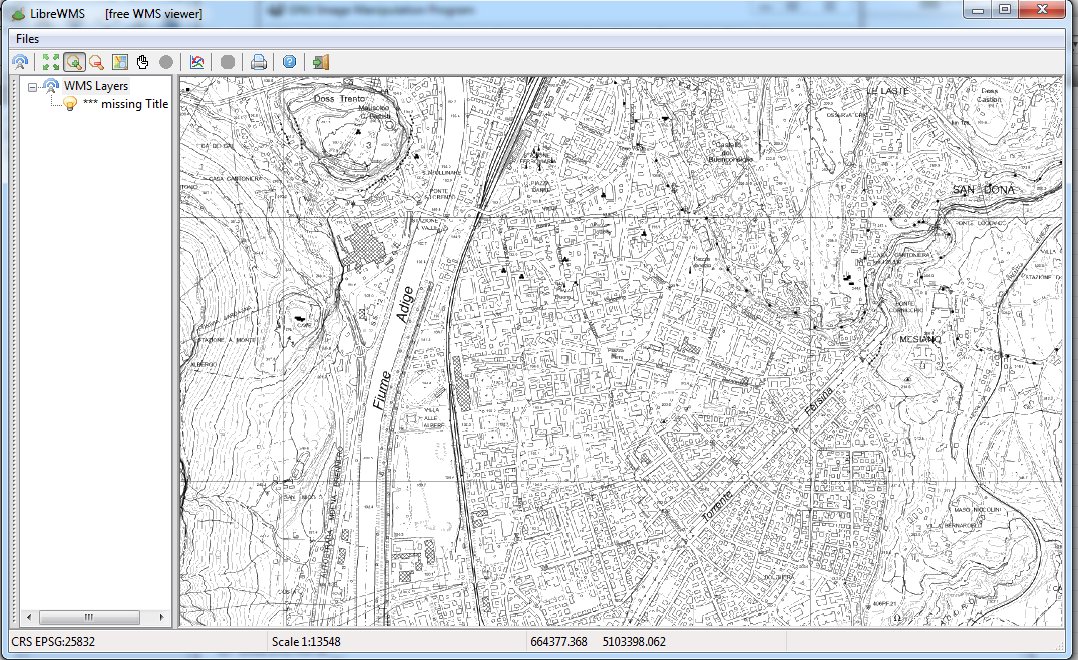
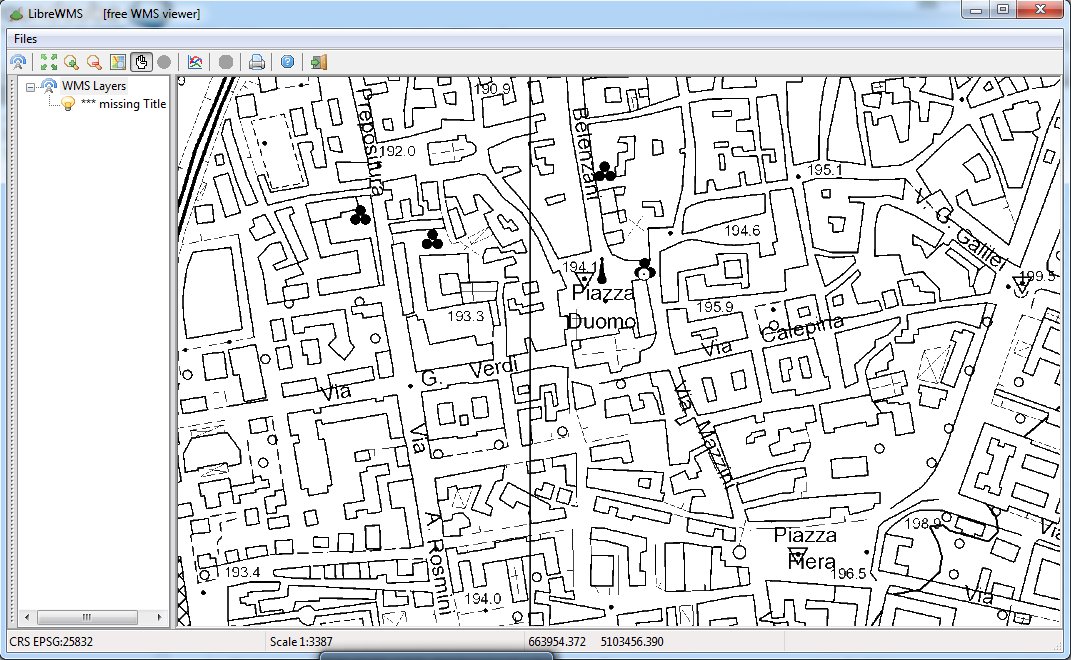
Please note: in the case of Monochrome Rasters RasterLite2 usually supports a wider range of high-quality rescaled images than many others similar tools.
This is because RasterLite2 always applies high quality interpolation algorithms while rescaling a Monochrome Raster; this way many halt-tone pixels are interpolated where appropriate so to preserve as much as possible crisp fine grained details.
The cost to pay for all this is a colorspace shift; all rescaled Pyramid Levels supporting a Monochrome Raster are implicitly of the grayscale type, thus requiring more storage space. It's a tradeof between quality and space.
Step 6) retrieving the Map layout
$ rl2tool MAP -db trento.sqlite -cov ctr  -outw 480 \
-outh 640 -dst trento-map.png

rl2_tool; request is MAP
===========================================================
           DB path: trento.sqlite
          Coverage: ctr
  Destination Path: trento-map.png
        Image Size: 512 x 640
===========================================================

     SQLite version: 3.8.5
 SpatiaLite version: 4.2.0-rc1
RasterLite2 version: 0.8

Operation MAP successfully completed
$
By invoking rl2tool MAP you can create a PNG image representing the overall Sections layout within a Coverage:
- -outw 480 -outh 640: these are the dimensions of the PNG image; in this case 480 x 640.
- -dst trento.png: this is the pathname of the PNG image to be created.
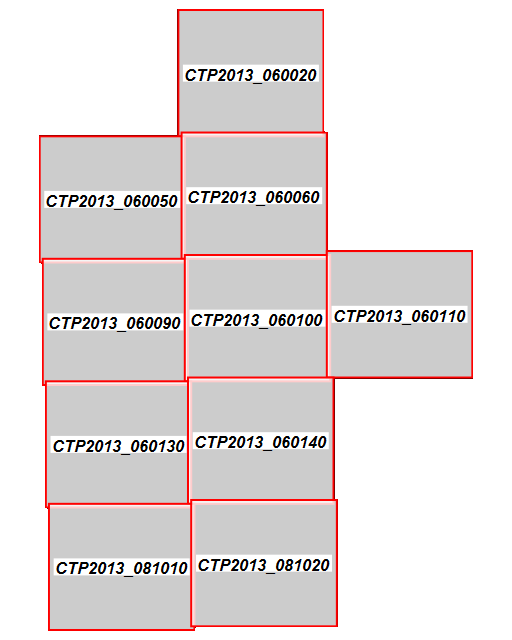
And this image corresponds to the actual output created by the above rl2tool MAP execution.
Step 7) creating and loading your own custom Monochrome Raster Styles
7.1) downloading the Monochrome styles
Just download the appropriate resource-pack from here; it contains any SLD/SE RasterSymbolizer required by this tutorial.7.2) exploring the SLD/SE Monochrome RasterSymbolizer anatomy
<?xml version="1.0" encoding="UTF-8"?>
<RasterSymbolizer version="1.1.0"
                xsi:schemaLocation="http://www.opengis.net/se http://schemas.opengis.net/se/1.1.0/Symbolizer.xsd"
                xmlns="http://www.opengis.net/se"
                xmlns:ogc="http://www.opengis.net/ogc"
                xmlns:xlink="http://www.w3.org/1999/xlink"
                xmlns:xsi="http://www.w3.org/2001/XMLSchema-instance">
	<Name>monochrome_red</Name>
	<Description>
		<Title>Monochrome CTR Red</Title>
		<Abstract>Monochrome CTR: red instead of black</Abstract>
	</Description>
	<Opacity>1.0</Opacity>
	<ColorMap>
		<Categorize fallbackValue="#ffffff">
			<LookupValue>Rasterdata</LookupValue>
			<Value>#ffffff</Value>
			<Threshold>1</Threshold>
			<Value>#ff0000</Value>
		</Categorize>
	</ColorMap>
</RasterSymbolizer>
You've already got few basic notions about RasterSymbolizer during the previous Trieste, Orbetello and ETOPO-1 tutorials: now we'll examine how to apply a ColorMap to a Monochrome Raster:
- a Color Map simply represents a lookup table.
- a Monochrome Raster has just a single hue; so you simply have to define a single Categorize rule intended to replace the standard base color (usually black by default).
7.3) importing all RasterSymbolizers into the DB-file
$ sqlite3 earth.sqlite
SQLite version 3.8.4.2 2014-03-26 18:51:19
Enter ".help" for usage hints.
sqlite> .null NULL
sqlite> SELECT load_extension('mod_spatialite');
NULL
sqlite> SELECT CreateStylingTables();
1
sqlite> SELECT RegisterRasterStyledLayer('ctr',
   ...> XB_Create(XB_LoadXML('./monochrome_styles/monochrome_red.xml'), 1, 1));
1
sqlite> SELECT RegisterRasterStyledLayer('ctr',
   ...> XB_Create(XB_LoadXML('./monochrome_styles/monochrome_blue.xml'), 1, 1));
1
sqlite> SELECT RegisterRasterStyledLayer('ctr',
   ...> XB_Create(XB_LoadXML('./monochrome_styles/monochrome_yellow.xml'), 1, 1));
1
sqlite> SELECT RegisterRasterStyledLayer('ctr',
   ...> XB_Create(XB_LoadXML('./monochrome_styles/monochrome_slate.xml'), 1, 1));
1
sqlite> SELECT RegisterRasterStyledLayer('ctr',
   ...> XB_Create(XB_LoadXML('./monochrome_styles/monochrome_light_gray.xml'), 1, 1));
1
sqlite> .quit
$
This step exactly corresponds to the task already explained in the Trieste, Orbetello and ETOPO-1 tutorials.
Step 8) testing the Trento CTR sample (and playing with Styles)
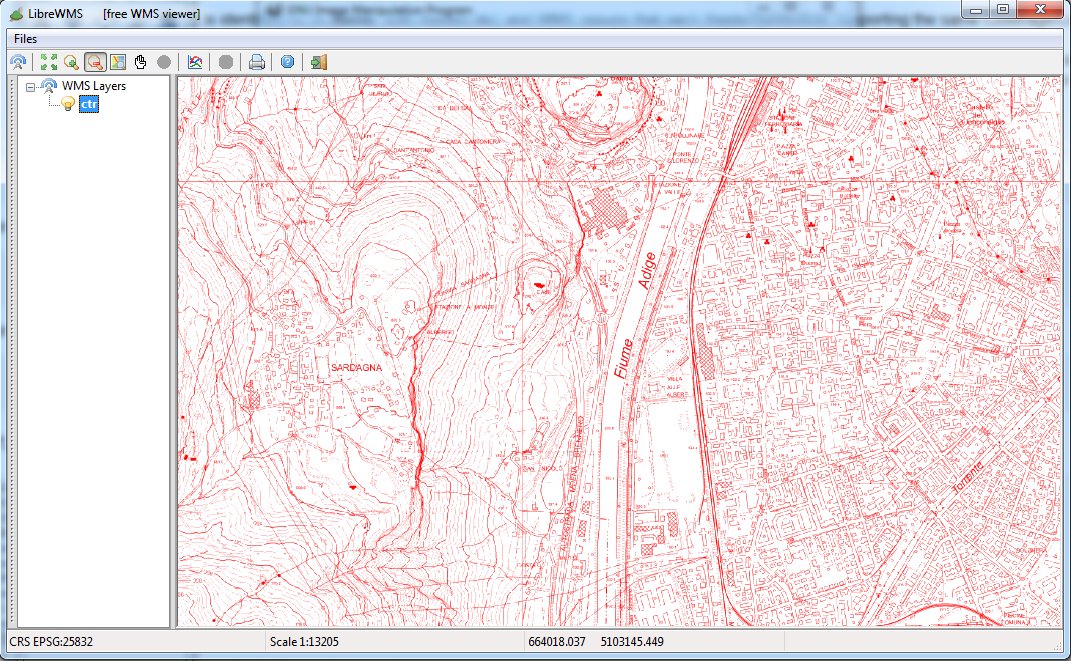
applying a Red hue: monochrome_red style.
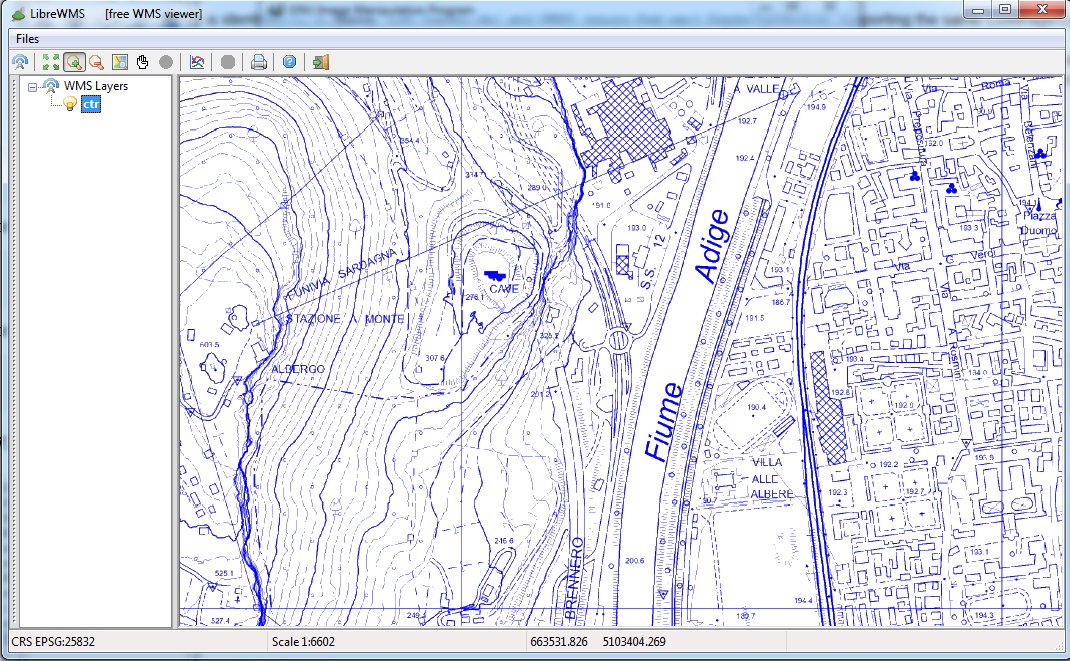
applying a Blue hue: monochrome_blue style.
These first two examples could be probably interesting enough: but there is no real added value, just a may be pleasant graphics effect.
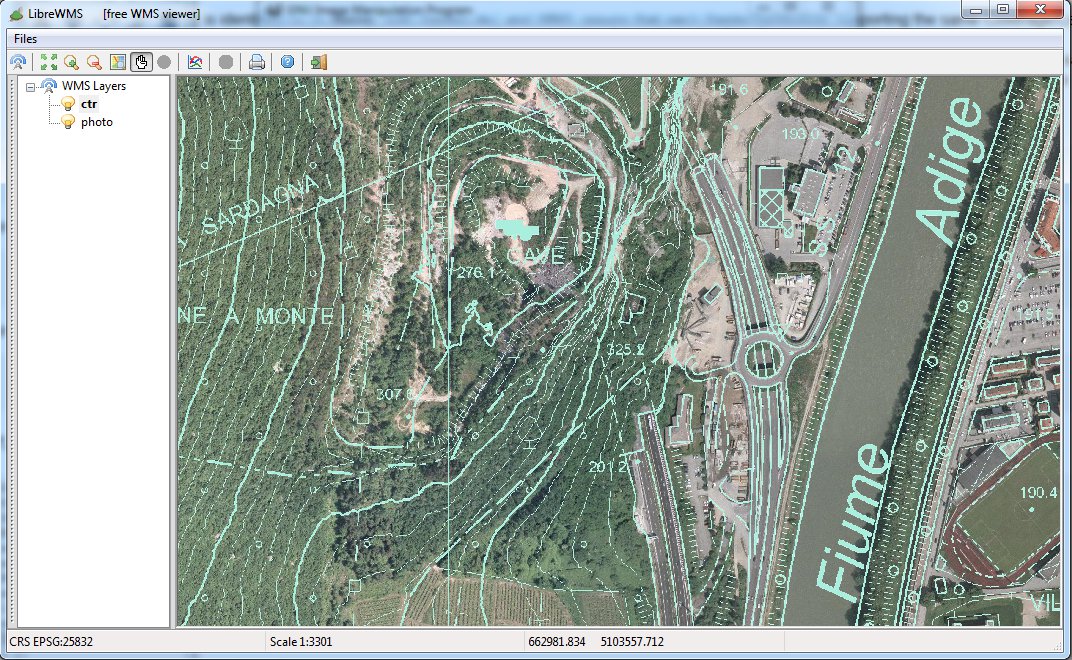
applying a Slate hue: monochrome_slate style.
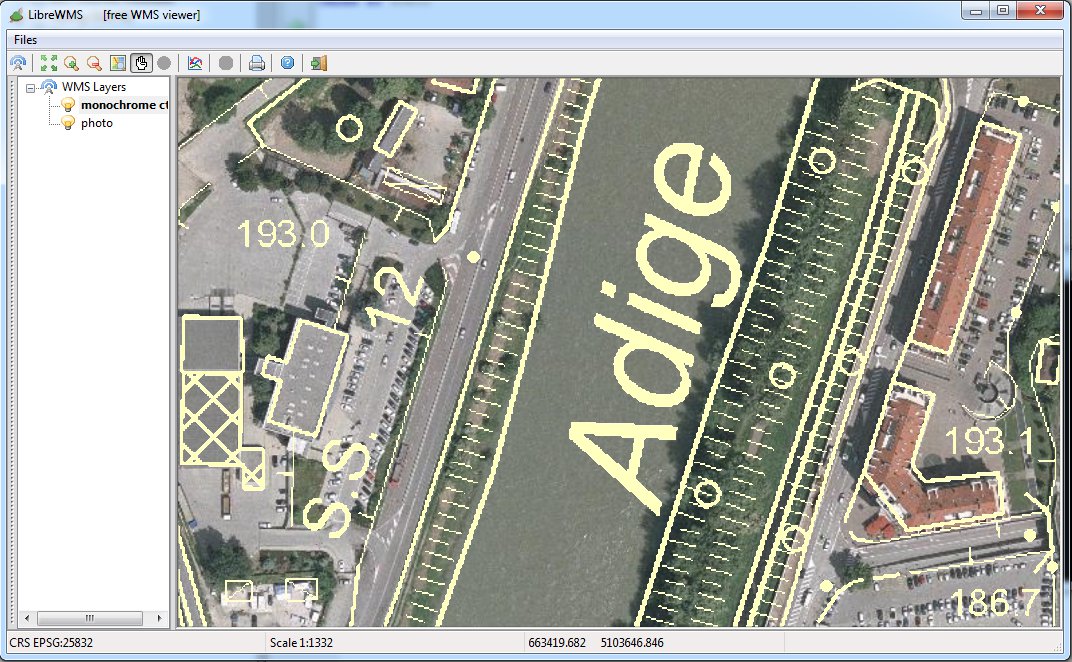
applying a Yellow hue: monochrome_yellow style.
These last two examples show the real reason behind Monochrome Raster Styles; Monochrome Raster are always intrinsically transparent, so you can overprint a Monochrome Raster on an other Raster background (in this case: RGB aerial orthophotos).
By applying an appropriate recoloring to the Monochrome Raster you'll then be able to ensure optimal readability of your complex maps; usually applying a very light/pale hue to the Monochrome Raster is the best possible option.
Back to RasterLite2 Tutorials index