| This one is a pure SQL task, and we'll assume that you should be already well accustomed to this. |
SELECT ImportShp('C:\vanuatu\toscana\ambiti_amministrativi\am_reg_region_am_reg', 'regione', 'CP1252', 3003);
SELECT ImportShp('C:\vanuatu\toscana\ambiti_amministrativi\am_prov_multipart', 'province', 'CP1252', 3003);
SELECT ImportShp('C:\vanuatu\toscana\ambiti_amministrativi\am_com_multipart', 'comuni', 'CP1252', 3003);
SELECT ImportShp('C:\vanuatu\toscana\Iternet\shp\\elem_ferr', 'elem_ferr', 'CP1252', 3003);
|
| Now a Spatial View will be created and properly registered. |
CREATE INDEX idx_codprov ON province (substr(codprov, 3));
CREATE VIEW municipalities AS
SELECT c.pk_uid AS rowid, c.nome AS municipality,
c.codcom AS census_code, c.codcatasto AS cadastral_code,
p.nome AS province, p.sigla AS car_plate,
c.geometry AS geom
FROM comuni AS c
JOIN province AS p ON (substr(p.codprov, 3) = c.codprov)
INSERT INTO views_geometry_columns
VALUES ('municipalities', 'geom', 'rowid', 'comuni', 'geometry', 1);
|
The tuscany.sqlite sample contains a meainingless mixed Geometry Types Spatial Table just intended for testing purposes.
You can easily create by yourself something similar, so just very skeletical
directions will be supplied here.
Please check the SQL Snippets on the side. |
CREATE TABLE mixed_geom_types (
id INTEGER PRIMARY KEY AUTOINCREMENT,
class TEXT NOT NULL,
nome TEXT NOT NULL);
SELECT AddGeometryColumn('mixed_geom_types', 'geom', 3003,
'GEOMETRY', 'XY');
INSERT INTO mixed_geom_types (id, class, nome, geom)
SELECT NULL, 'Points', name, point_geom
FROM point_table;
INSERT INTO mixed_geom_types (id, class, nome, geom)
SELECT NULL, 'Linestrins', name, linestring_geom
FROM linstring_table;
INSERT INTO mixed_geom_types (id, class, nome, geom)
SELECT NULL, 'Polygons', name, polygon_geom
FROM polygon_table;
|
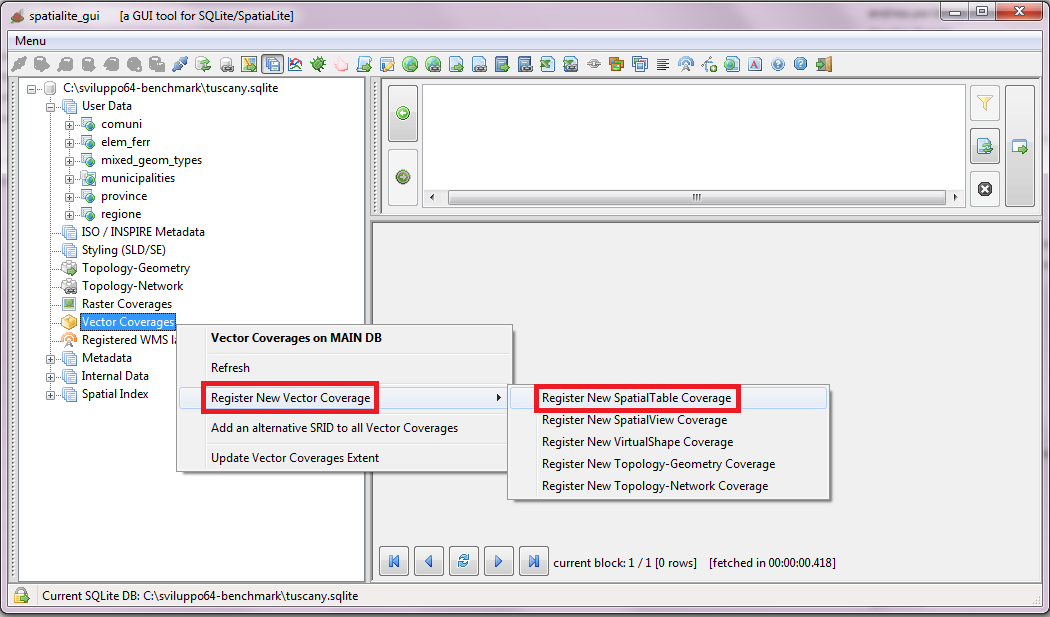
Spatial Tables declaring a GEOMETRYCOLLECTION or GEOMETRY Type aren't considered at all exceptional in SpatiaLite.
You just have to create a Vector Coverages as you've already seen in the previous tutorial about natural_earth.sqlite. |
 |
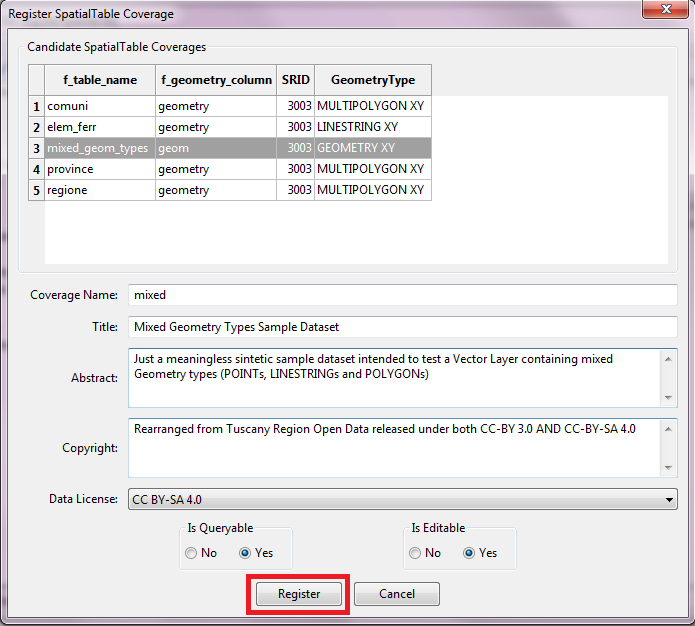
| Just select a Spatial Table from the list, then fill all dialog fields and finally confirm. |
 |
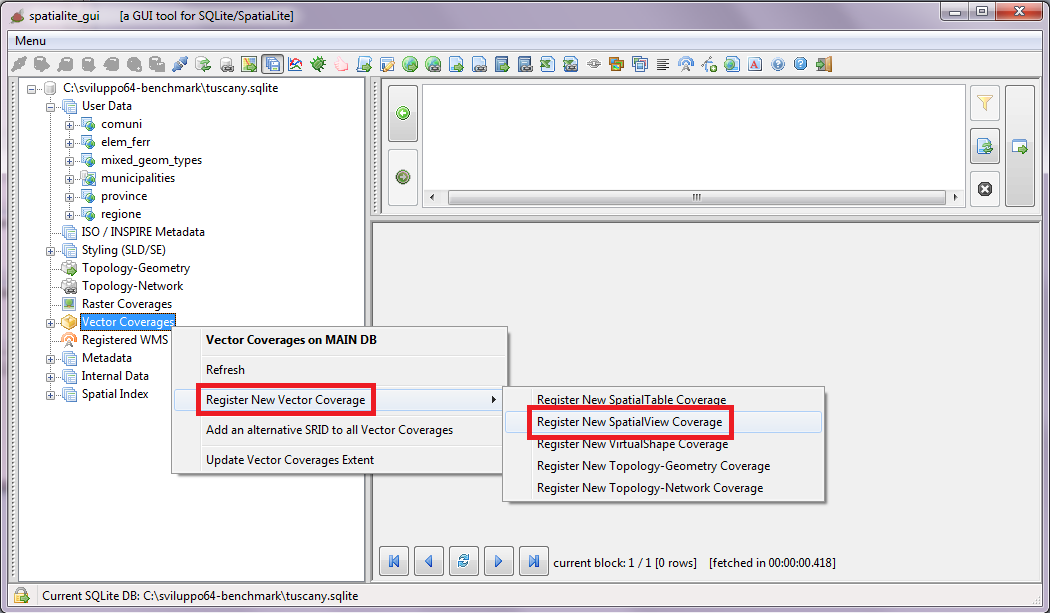
| Registering a Vector Coverage based on some Spatial View is more or less the same: you just have to select a different tool from the menu. |
 |
| Just select a Spatial Table from the list, then fill all dialog fields and finally confirm. |
 |
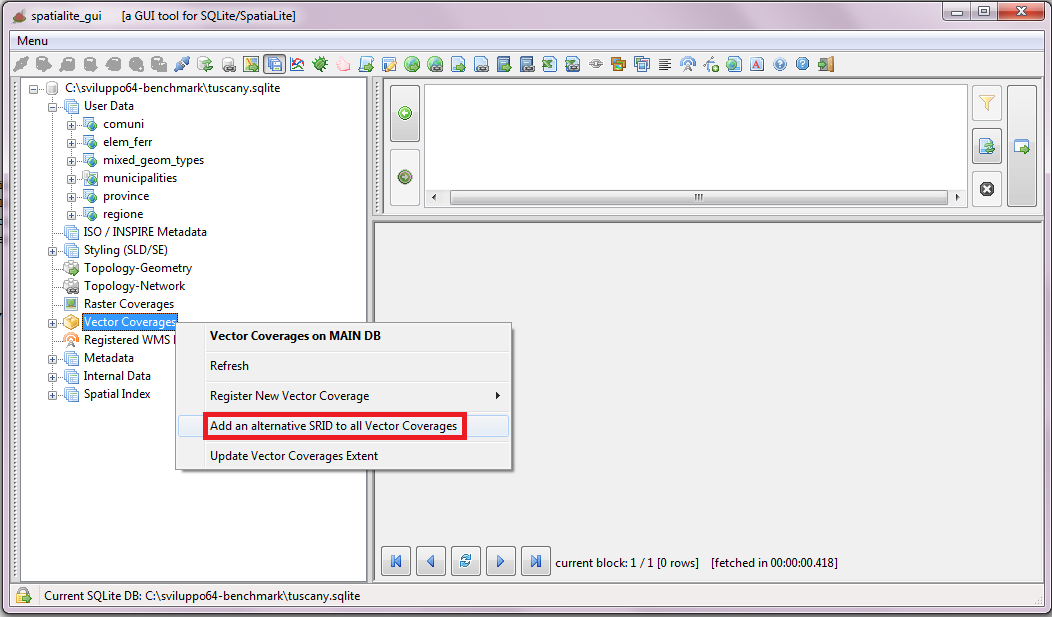
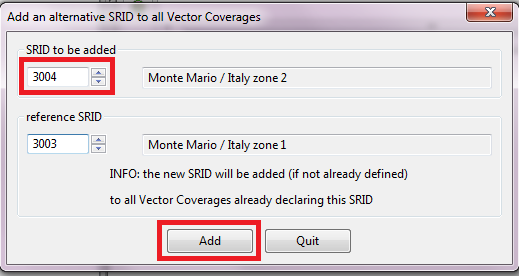
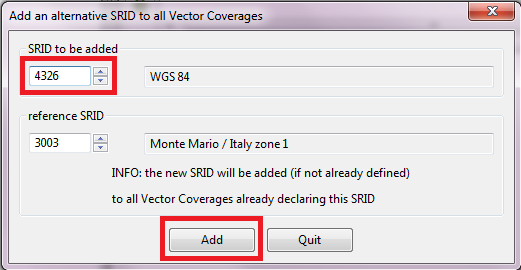
SpatiaLite possess the capability to reproject on-the-fly a Vector Coverage, but you have to declare in advance all the supported SRIDs.
When you have to configure several strictly related Vector Coverages it could be simpler and easier configuring all Coverages in a single final pass. |
 |
| You can add just a single SRID at each time, but you can easily recicle on the same step until all SRIDs have been added. |
|
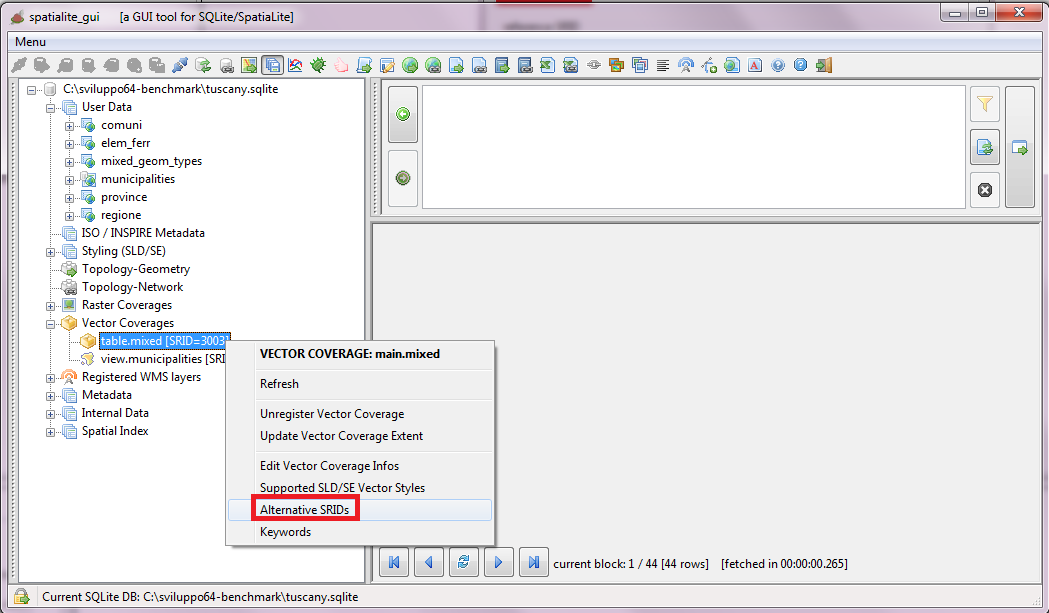
| Alternatively you can add or delete the associated SRIDs just for a single Vector Coverage. |
 |
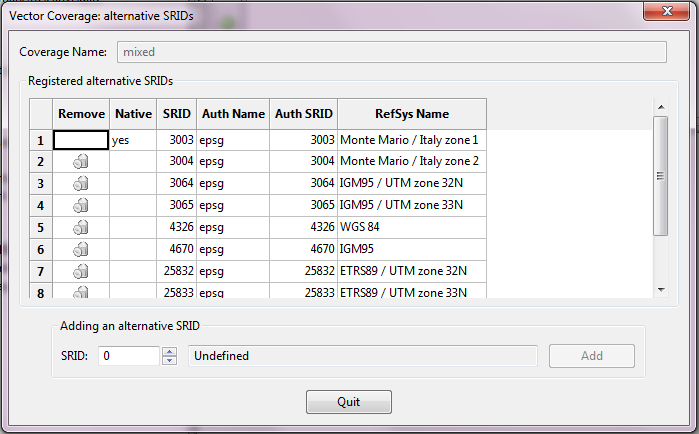
| Just use the dialog shown on the side in order to add or remove SRID definitions. |
 |
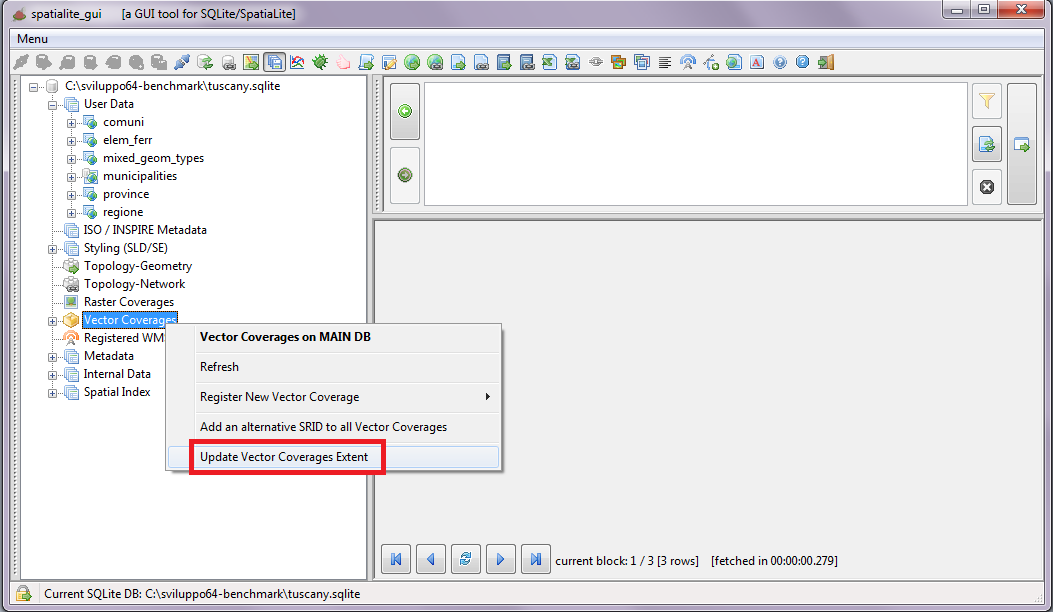
| Remember: you always have to update the Extents every time that you'll add a new Vector Coverare or that you'll change its associated SRIDs. |
 |
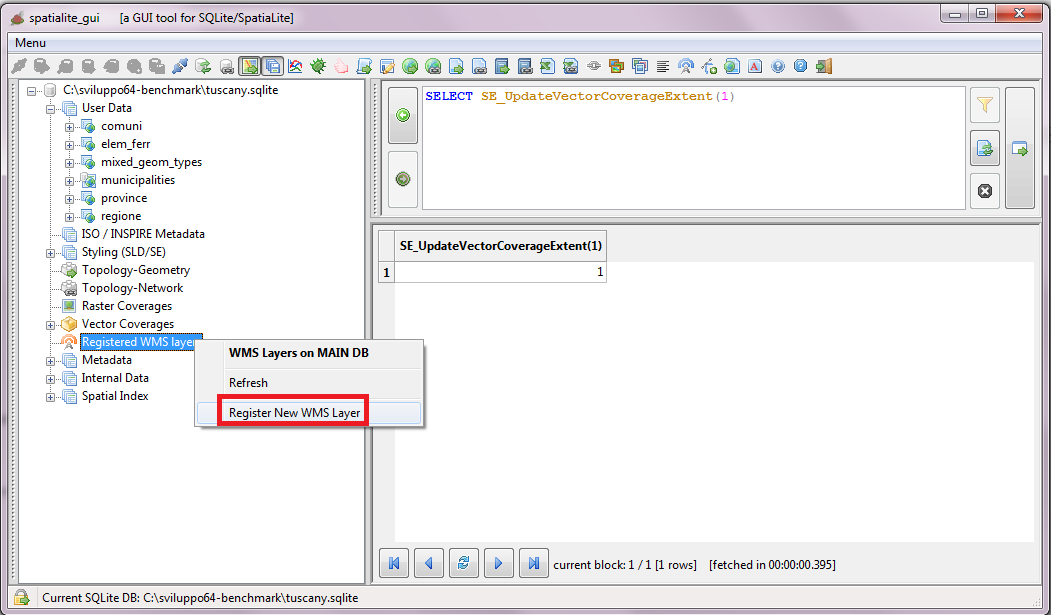
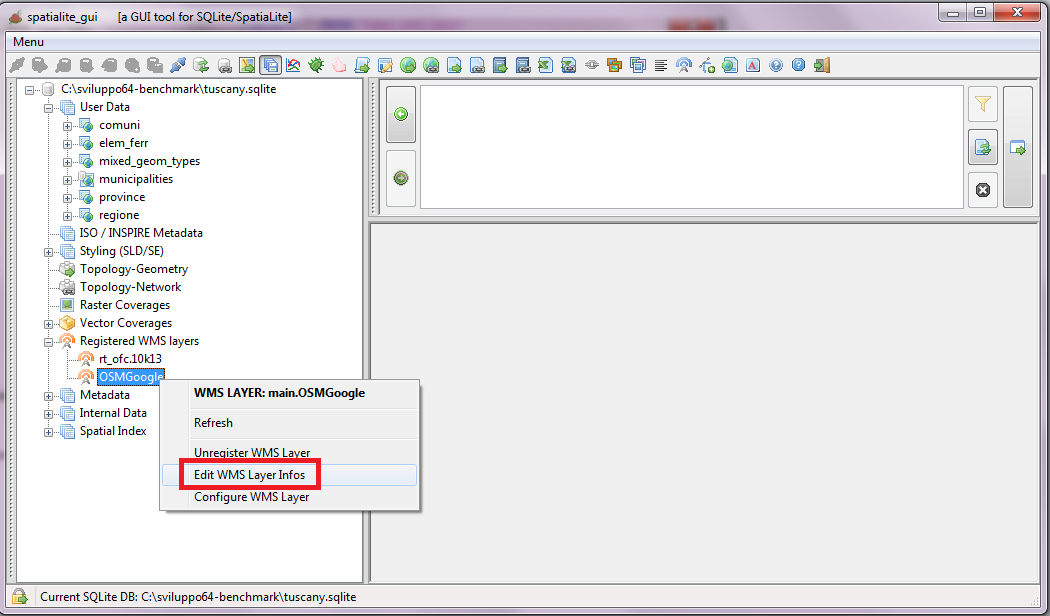
| SpatialLite possess the capability to permanently register WMS Layers into a database file. |
 |
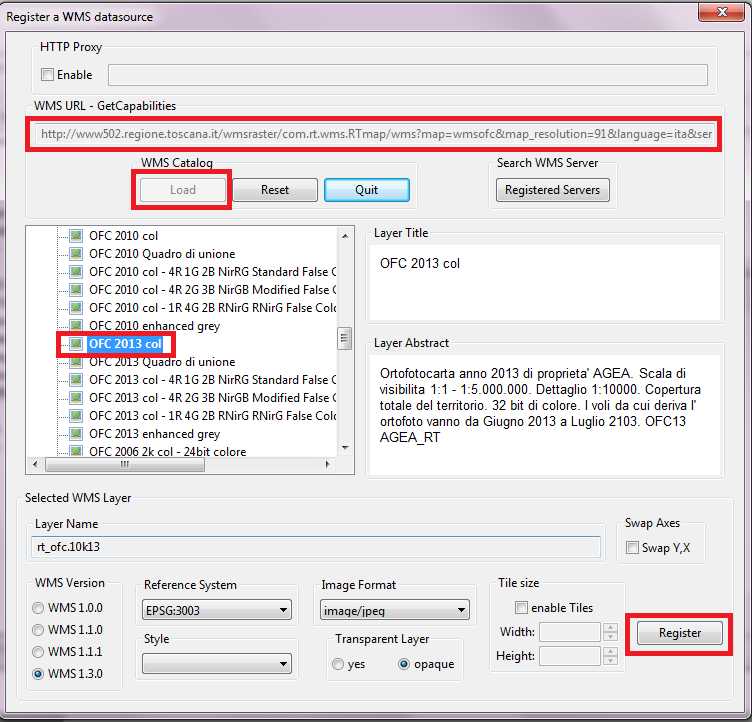
You are required first to manually insert the URL corresponding to the WMS GetCapabilitis, then pressing the Load button.
May well be that your local network configuration could require defining an HTTP Proxy Server.
If the above GetCapability URL do effectively match an existing WMS server a list of WMS layers will appear: just select the one you intend to register, adjust the WMS configuration then confirm.
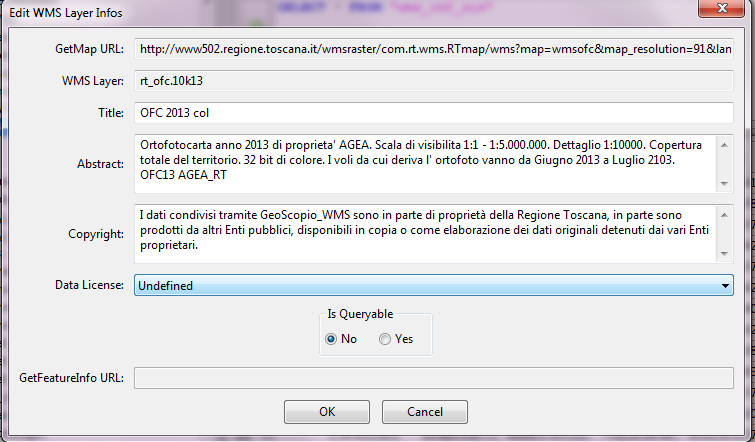
In this specific example you'll register a WMS layer based on the most recent (2013) version of Aerual Ortophoto fully covering whole Tuscany. |
 |
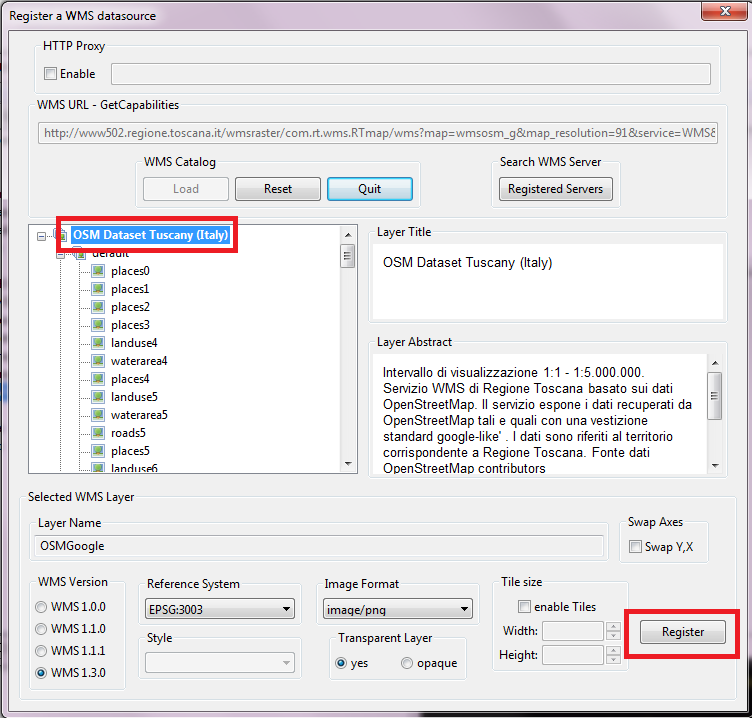
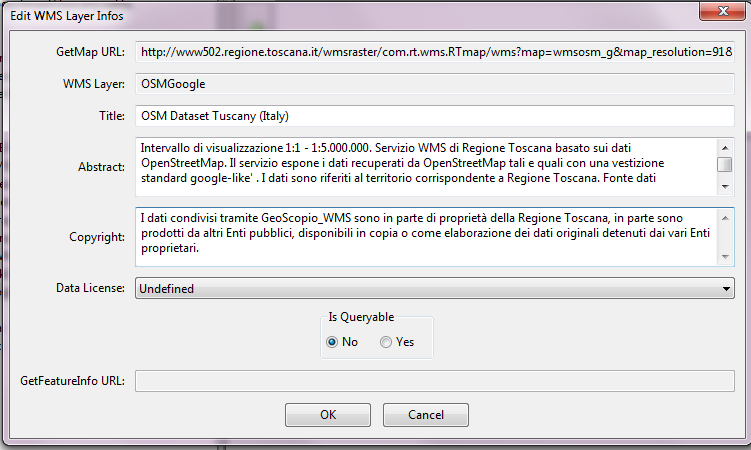
Now you'll register a second WMS layer based on Open Street Map vector datasets styled like the very popular GeooleMaps.
Note: in this case you'll not select any specific child layer; you'll select instead the parent WMS super-layer, so to get a complete OSM Map in a single WMS request. |
 |
| As you have already seen about Raster and Vector Coverages, explicitly setting Copyright and License informations always is a best practice; this applies to WMS Layers too. |
 |
| This is the dialog box corresponding to the Aerial Ortophotos WMS Layer. |
 |
| And this is the dialog box corresponding to the OSM Google WMS Layer. |
 |
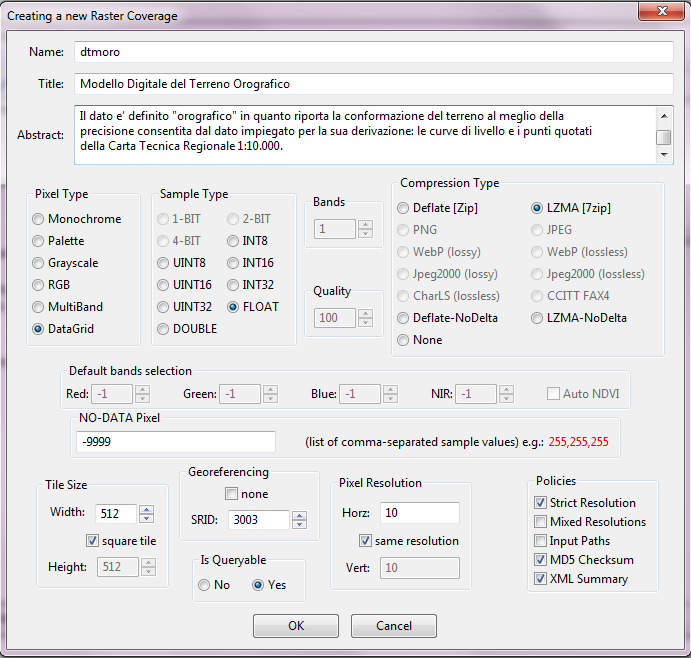
Final task: now you are requested to set up a Raster Coverage based on the dtmoro.asc DTM.
This is practically identical to what you've previously seen about the ETOPO1 dataset, and you'll apply once again the same styling rules.
So we'll just explain the few relevant differences. |
Creating the Raster Coverage
dtmoro is a Numeric Data Grid exactly as ETOPO1, anyway a difference exists:
- ETOPO1 is based on 16 bit signed integer values.
- dtmoro.asc is based on floating point single precision values.
|
 |
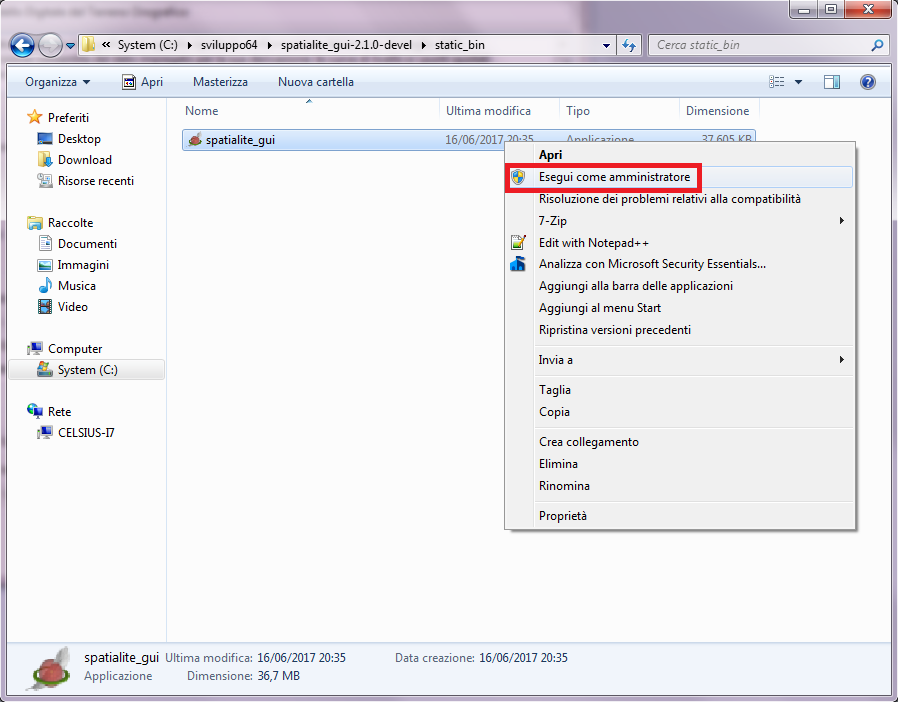
Important notice
If you are working on any recent version of MS Windows you strictly require to executed spatialite_gui under administator's privileges in order to succesfully import an ASCII Grid (as dtmoro.asc is).
This is because Windows 7, Windows 8 and Windows 10 for security reasons forbid to create temporary files on the local file systems to all unauthorized users.
The same limitation obviously applies to rl2tool.exe and to mod_rasterlite2.dll because is dictated by the underlying operating system.
This odd limitation is Windows-specific, and never applies to sane minded Linux, Mac OS x or Unix-like platforms. |
 |
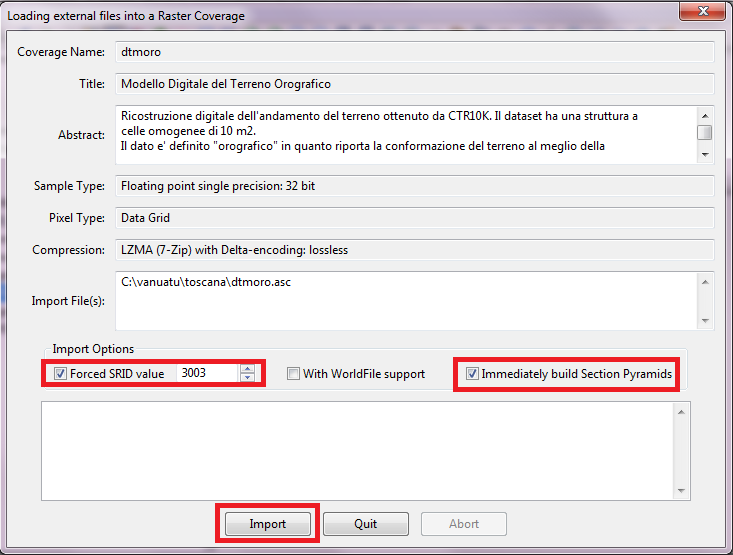
Loading an ASCII Grid
Note: you have to explicitly set an appropriate SRID value, because the ASCII Grid format does not support any internal SRID declaration. |
 |
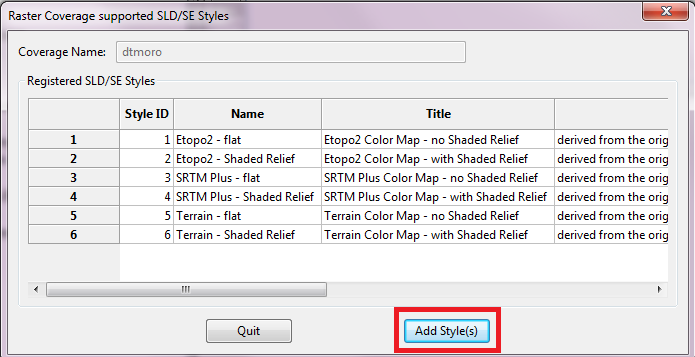
Styling the DTM
Just follow the same procedure already explained about ETOPO1. |
 |
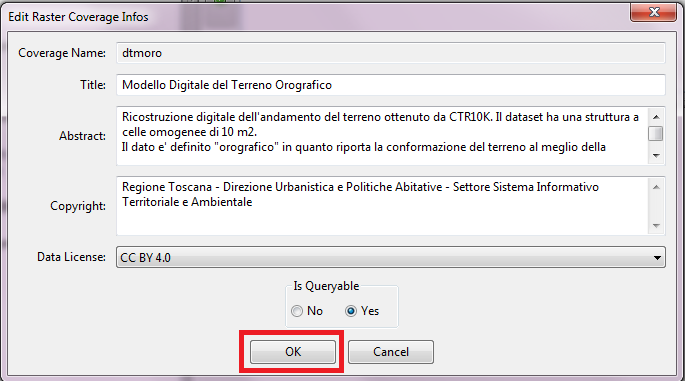
Defining Copyright and License informations
Remember: this always is a warmly suggested best practice. |
 |
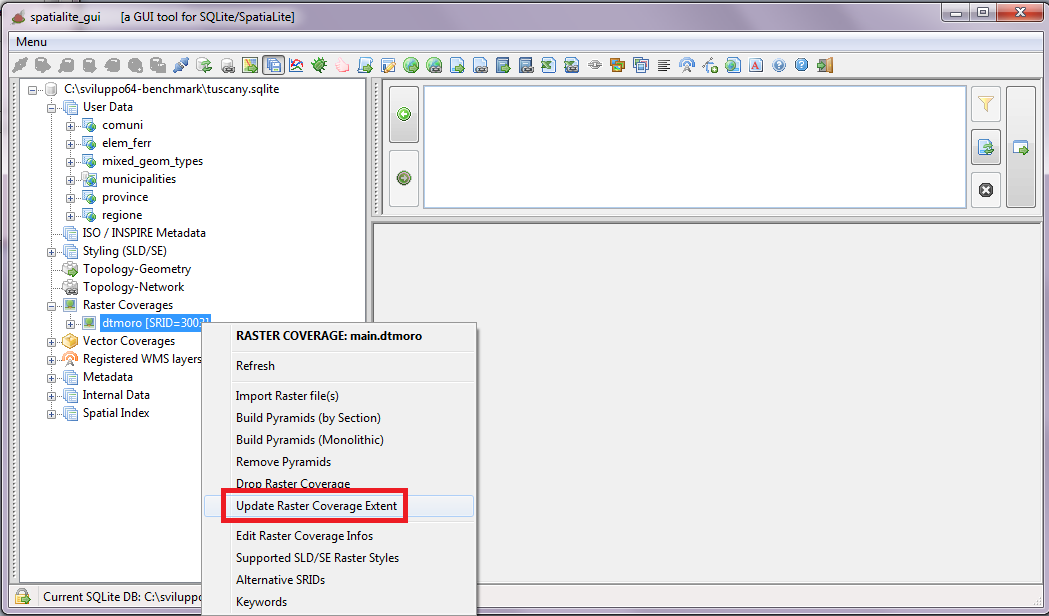
Final step: you have now to compute the full Extent (BBOX) for the dtmoro Raster Coverage.
All right; the tuscany.sqlite sample database is now ready to be published !
|
 |