Back to Map tool page
Testing the natural_earth.sqlite sample database
This quick tutorial explains, by practical step by step examples, how to use the Map Panel tool.The goal is to familiarize yourself with the new Map Panel feature, by repeating each single step shown.
- You need to download the natural_earth.sqlite sample database.
- Then you must start spatialite_gui 2.1.0, connecting to this database.
Step #1: displaying Vector Coverages
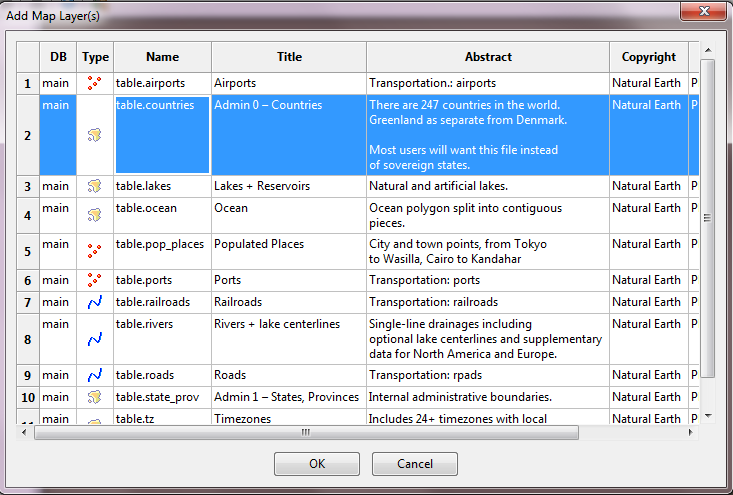
| The natural_earth.sqlite sample contains several Vector Coverages of all Geometry classes (POINTs, LINESTRINGs and POLYGONs). You'll start first by adding to the Map the table.countries Vector Coverage (POLYGONs). |
 |
| The countries Coverage is associated to a single Categorized Style that will be automatically applied. | 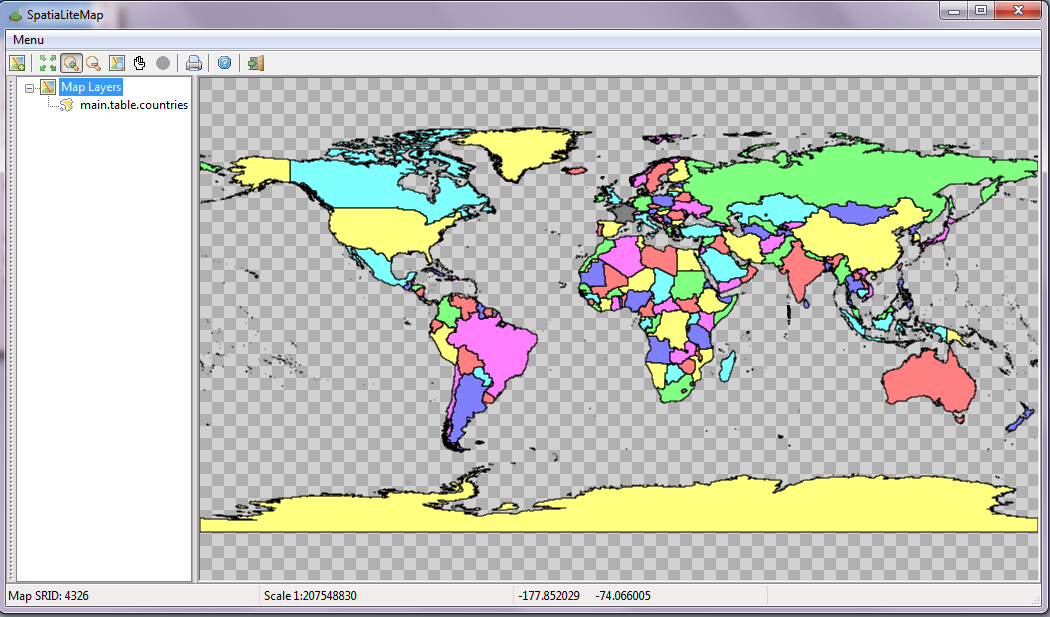 |
| Now add to the Map a second Vector Coverage named: table.ocean. | 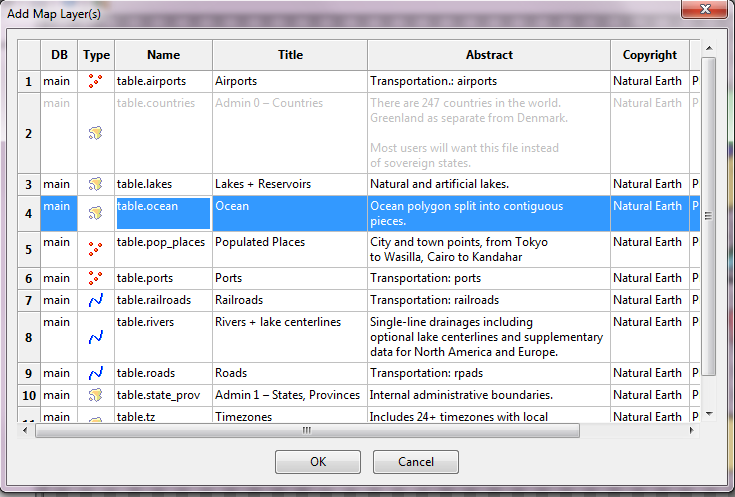 |
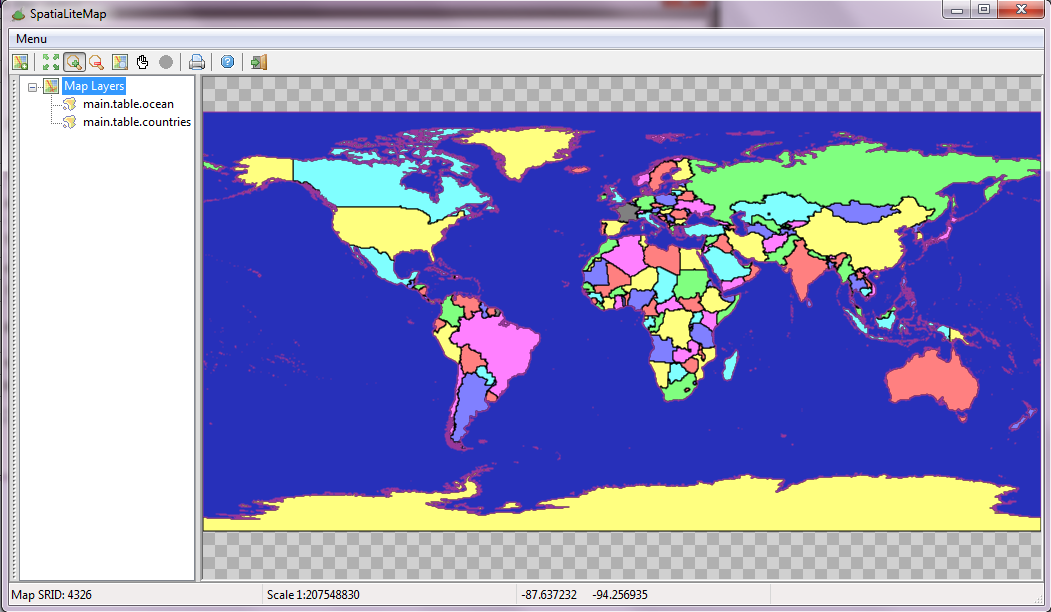
| The ocean Coverage has no declared Style, so the Map Panel tool will assign to it a special Style based on randomly choosen settings. Such a special Style is known as a QuickStyle. |
 |
| You can easily modify the QuickStyle settings to something more to your liking. | 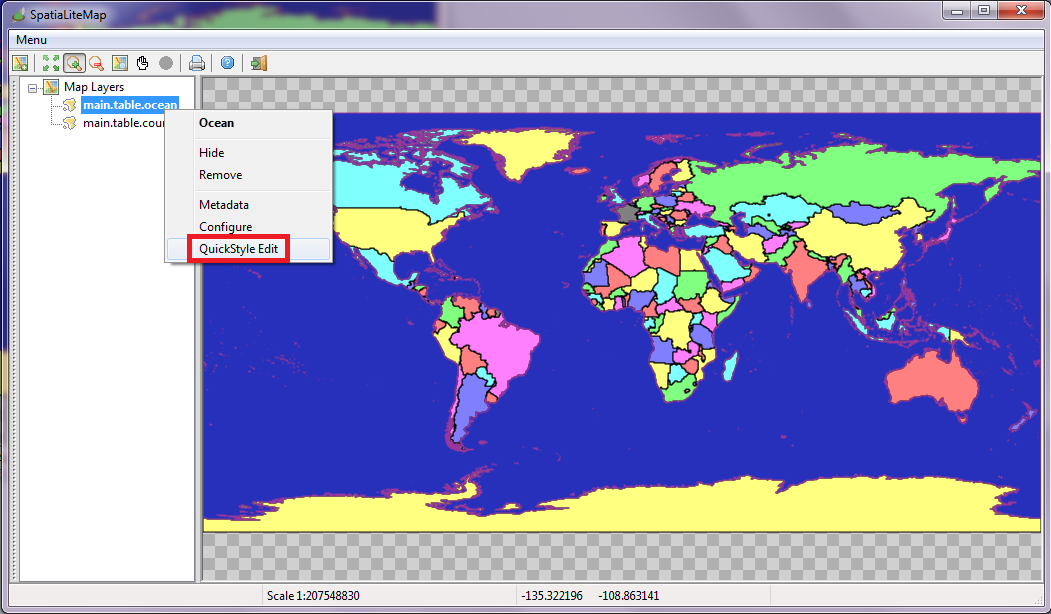 |
Hint: you could eventually set a Visibility Range, which would only apply within a set Minimal/maxium Scale. |
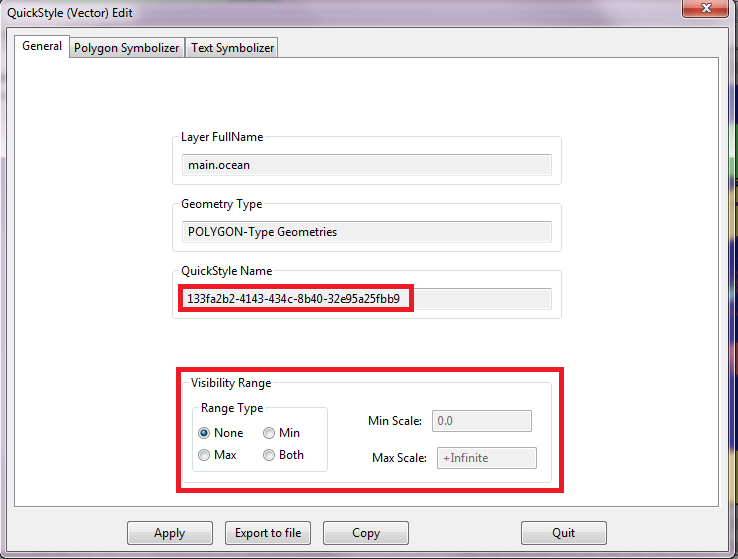 |
| Select more appropriate Fill and/or Stroke colour, and (possibly) adapt the Opacity so that it become more transparent, then press the Apply button. |  |
| et voilà: the new Style settings will be immetiately applied to the Map. | 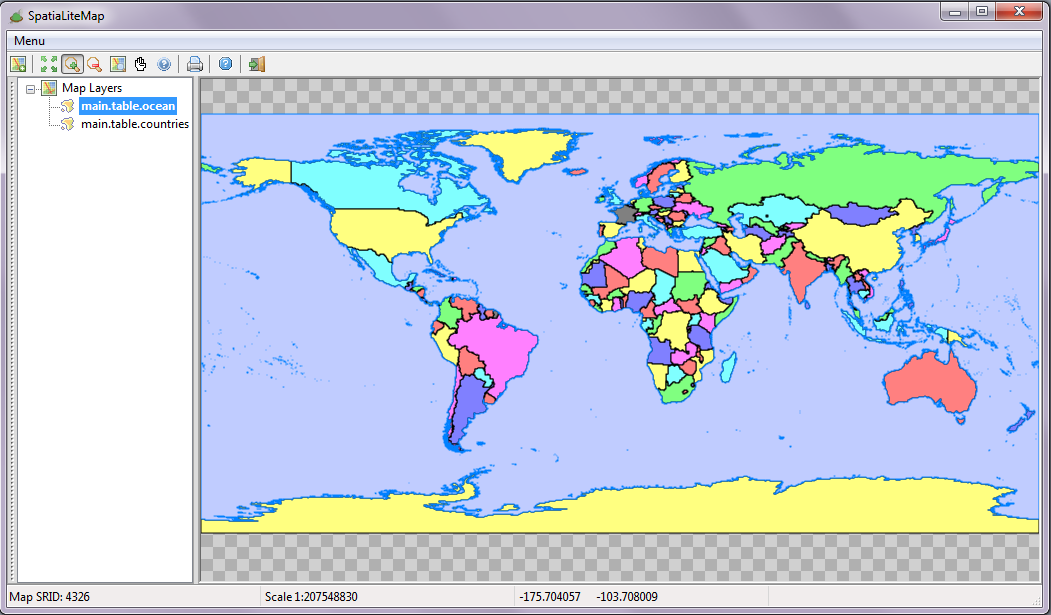 |
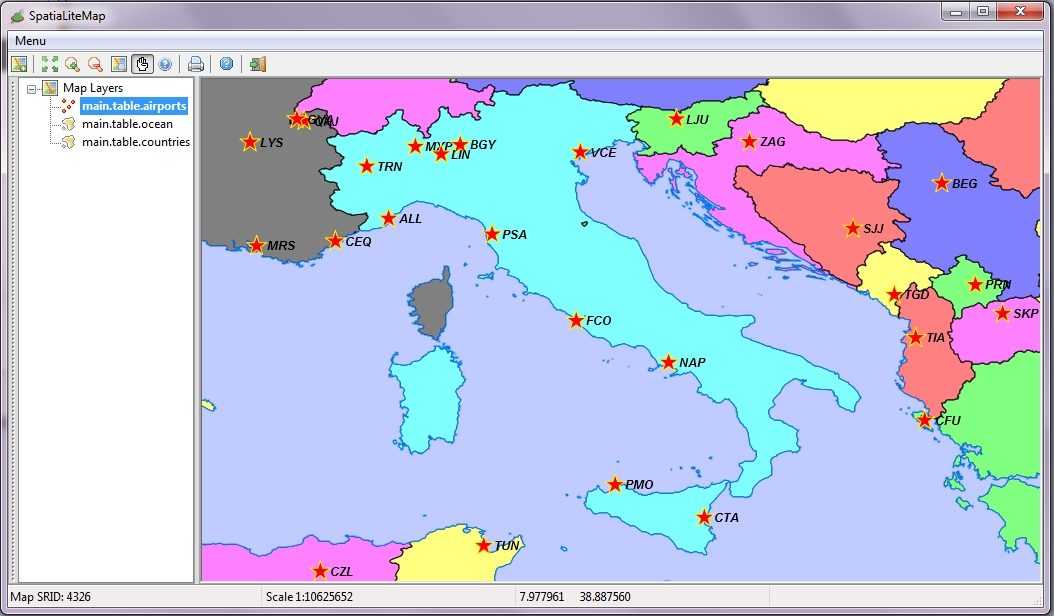
| Now add a third Vector Coverage to the Map: table,airports. | 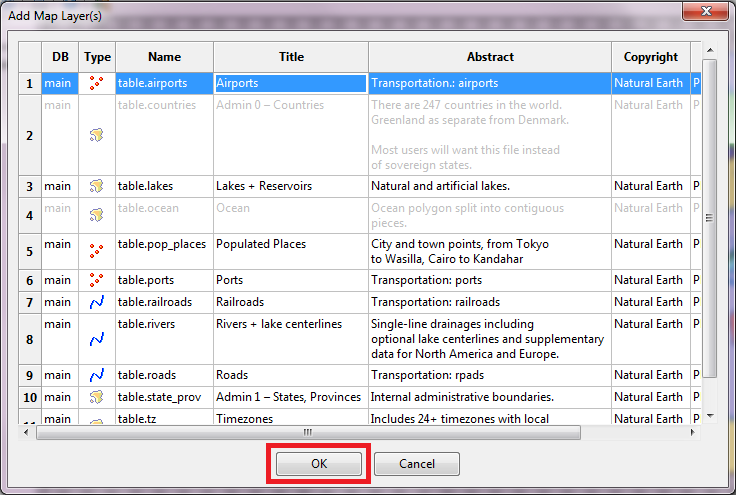 |
| The airports Coverage is supported by two alternative Styles: as always, the first one will automatically be applied to the Map. | 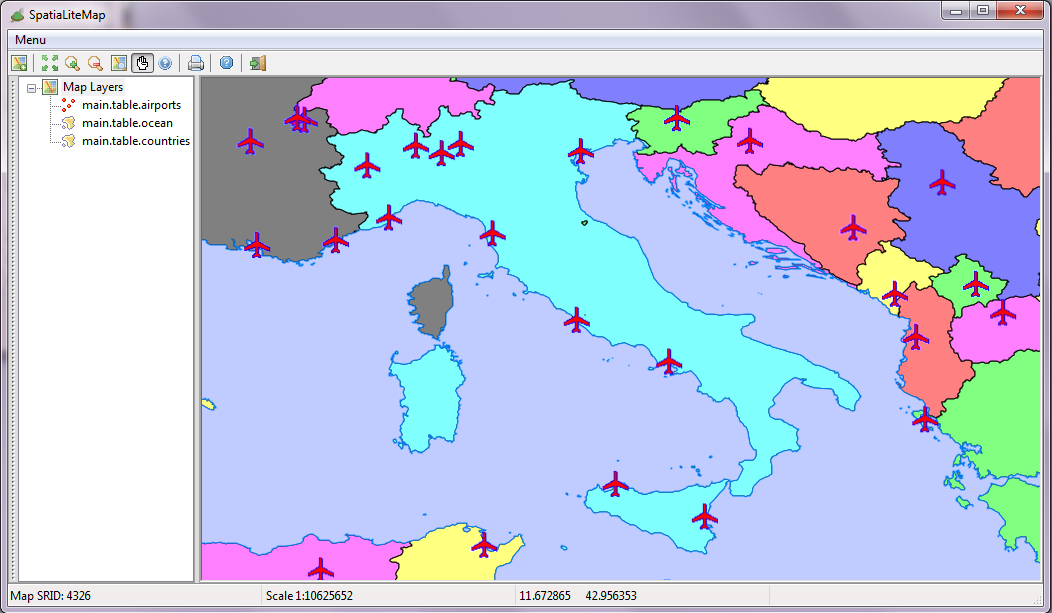 |
| Use the Configure dialog in order to apply the second alternative Style. | 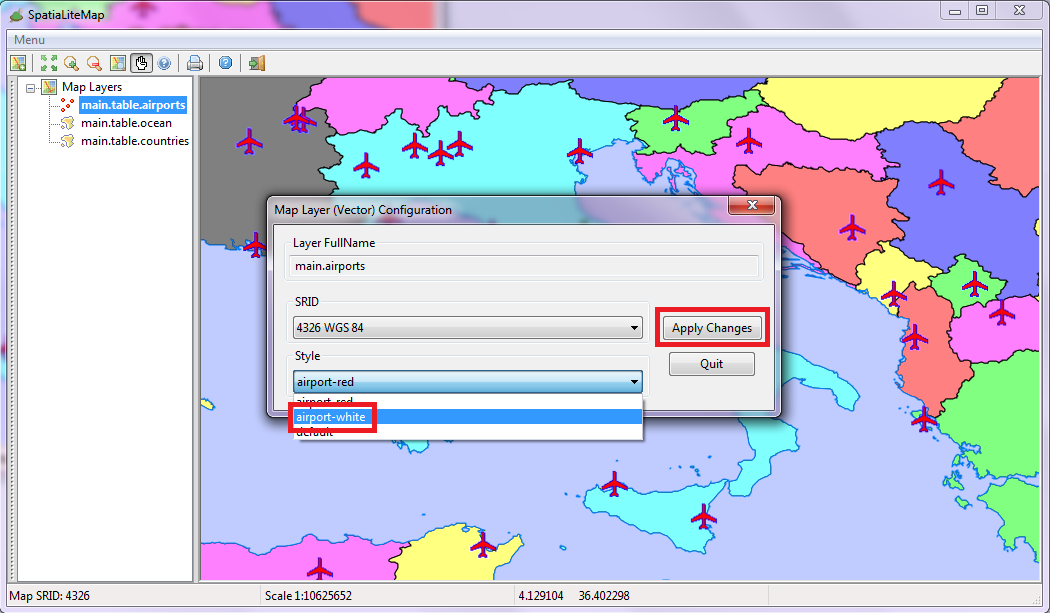 |
| Once selected the new Style will be immediately applied to the Map. |  |
| All Vector Coverages can be used with a QuickStyle, including all Coverages already containing some pre-defined Style. So you can now use the QuickStyle Edit tool in order to create a Style of your own supporting airports. You would first set a Point Symbolizer. |
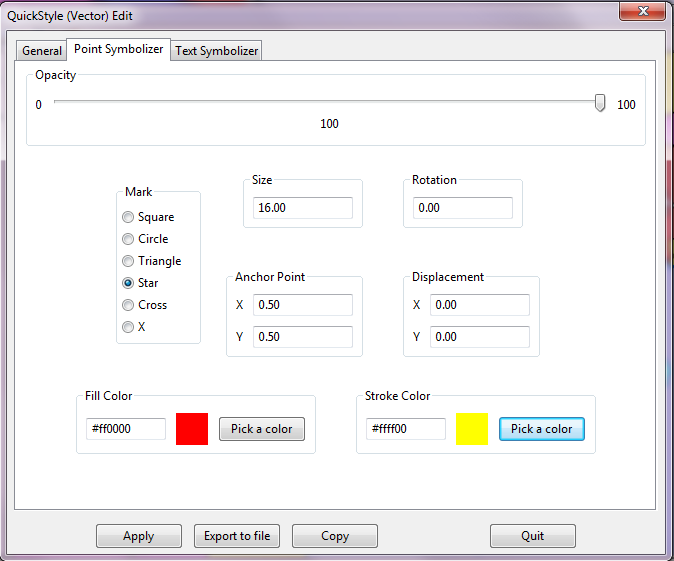 |
| ... then (possibly) continue by defining a Text Symbolizer as well. Press the Apply button. |
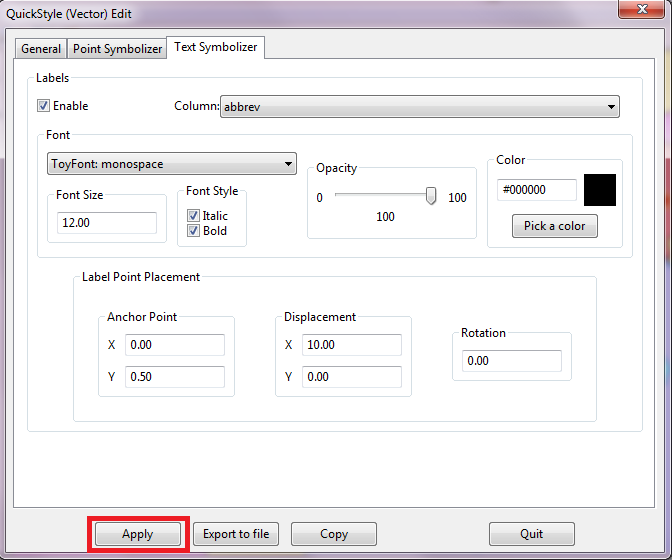 |
The Map will be immediately updated reflecting the new custom Style.
Recapitulation
|
 |
Step #2: displaying Vector Coverages over a Raster Background stored in another database
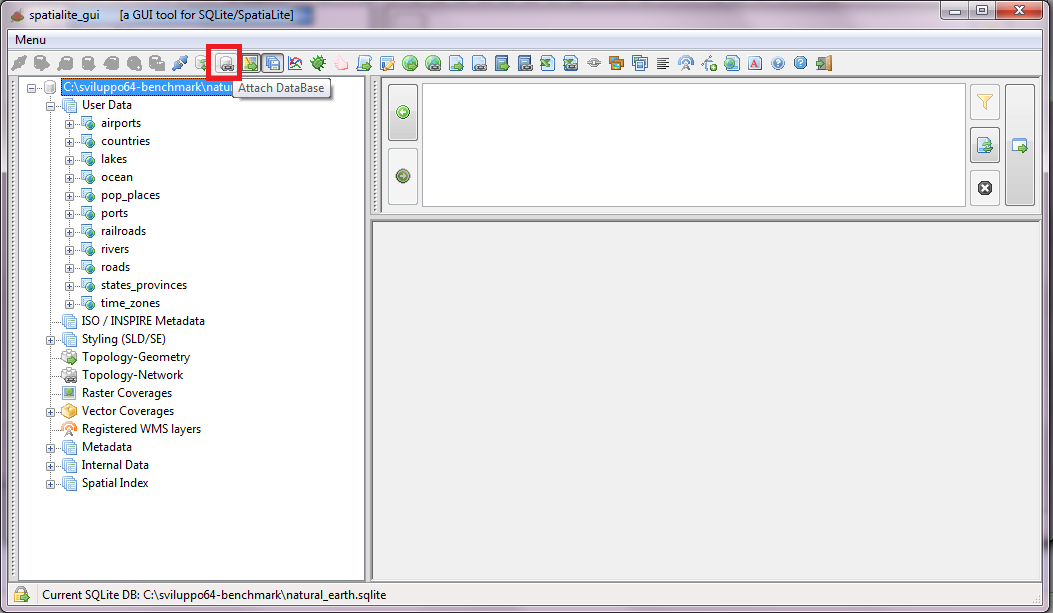
| The world_rasters.sqlite sample contains the BLUE MARBLE Raster Coverage. You can easily add this Raster Coverage to your current Map. From the SQL Panel select the Attach Database tool and attach world-coverages.sqlite to the currently connected database. WarningNever directly execute the ATTACH DATABASE and/or DETACH DATABASE SQL statements when using the Map Panel: it can cause an unstable configuration.Always use the corresponding GUI tools. |
 |
| Now, after attaching world-rasters.sqlite, you can add the ETOPO1 Raster Coverage to your Map. | 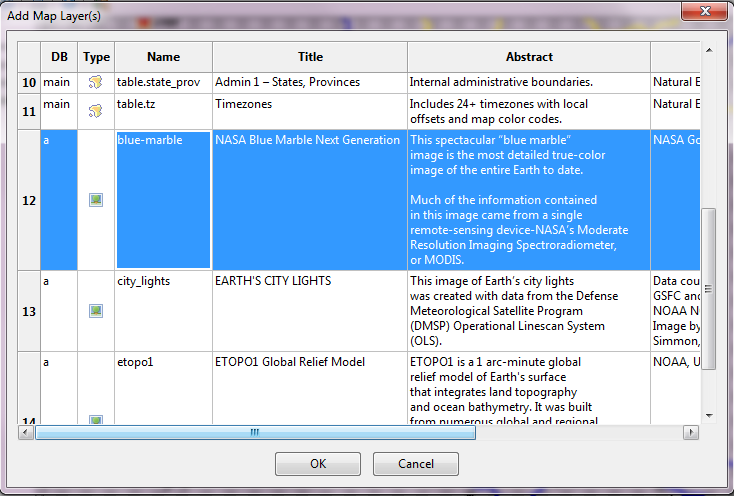 |
| And finally add the rivers Vector Coverage to your Map. | 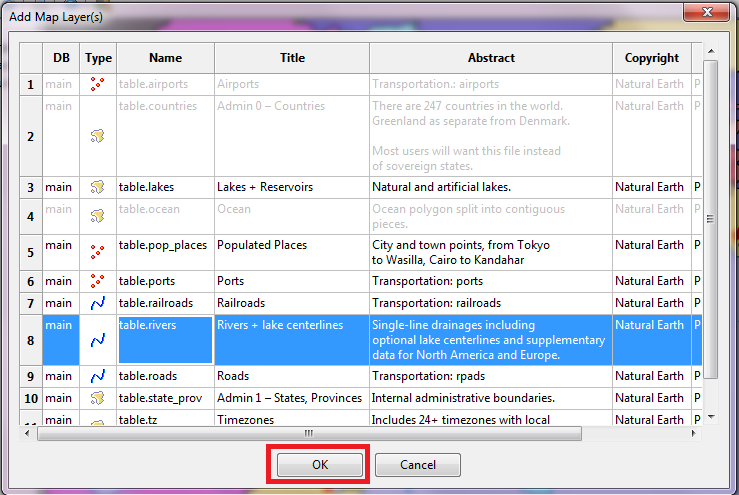 |
| Exercise: try by yourself to display a Map looking like the one shown in the side figure. | 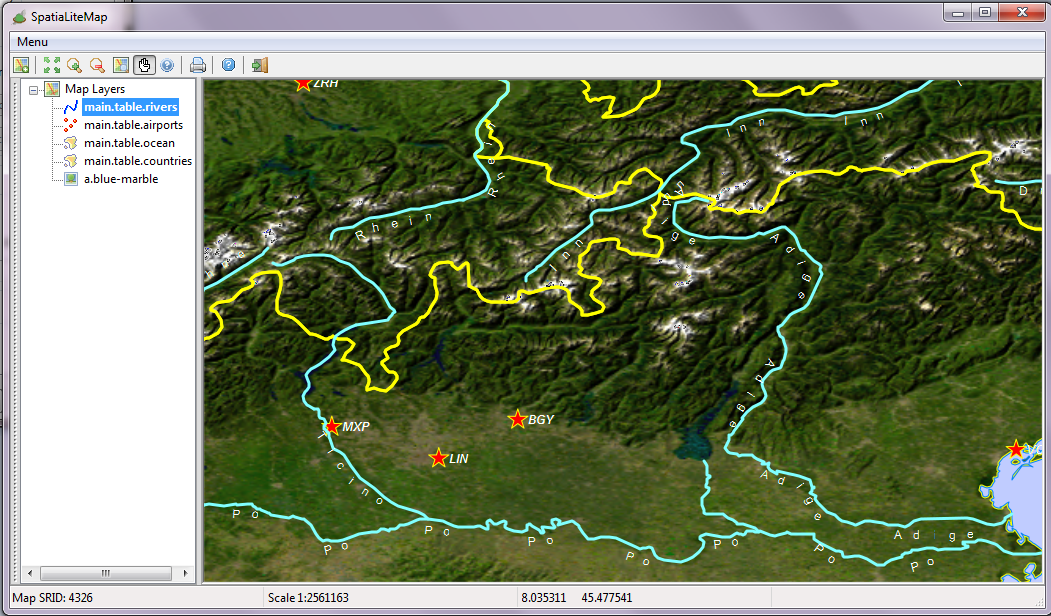 |
Useful hintThese are the suggested settings for the Text Symbolizer supporting rivers. |
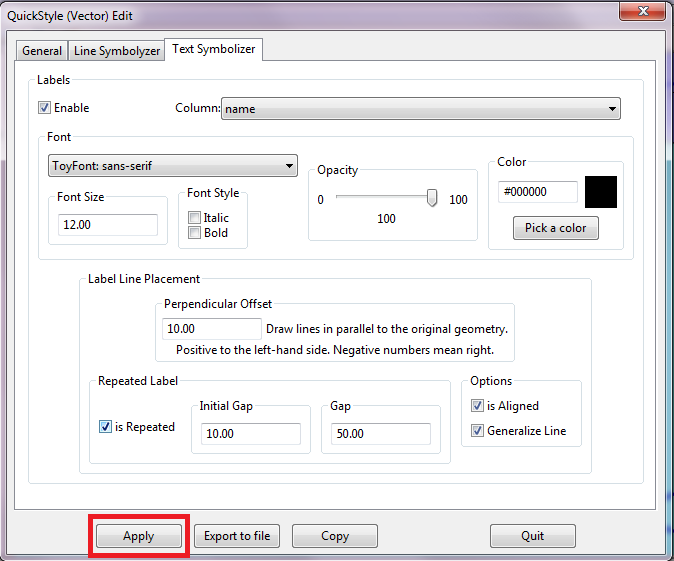 |
Back to Map tool page